# 5-3 Vuex 整合實戰!以口罩地圖為例
如果讀者從頭跟著本書的節奏一路看到這裡,其實我們已經介紹完 Vue.js 大部分的功能了。 那麼在這個章節的最後,我想用一個實際的案例來帶大家看看一個 Vue.js 搭配 Vuex 專案結構比較完整的樣貌。
# 口罩地圖緣起
這次範例的口罩地圖,其實是在 2020 年初,由政府資料開放平台提供的「健保特約機構口罩剩餘數量明細清單」 https://data.gov.tw/dataset/116285 (opens new window) 所提供的開放資料作為示範。
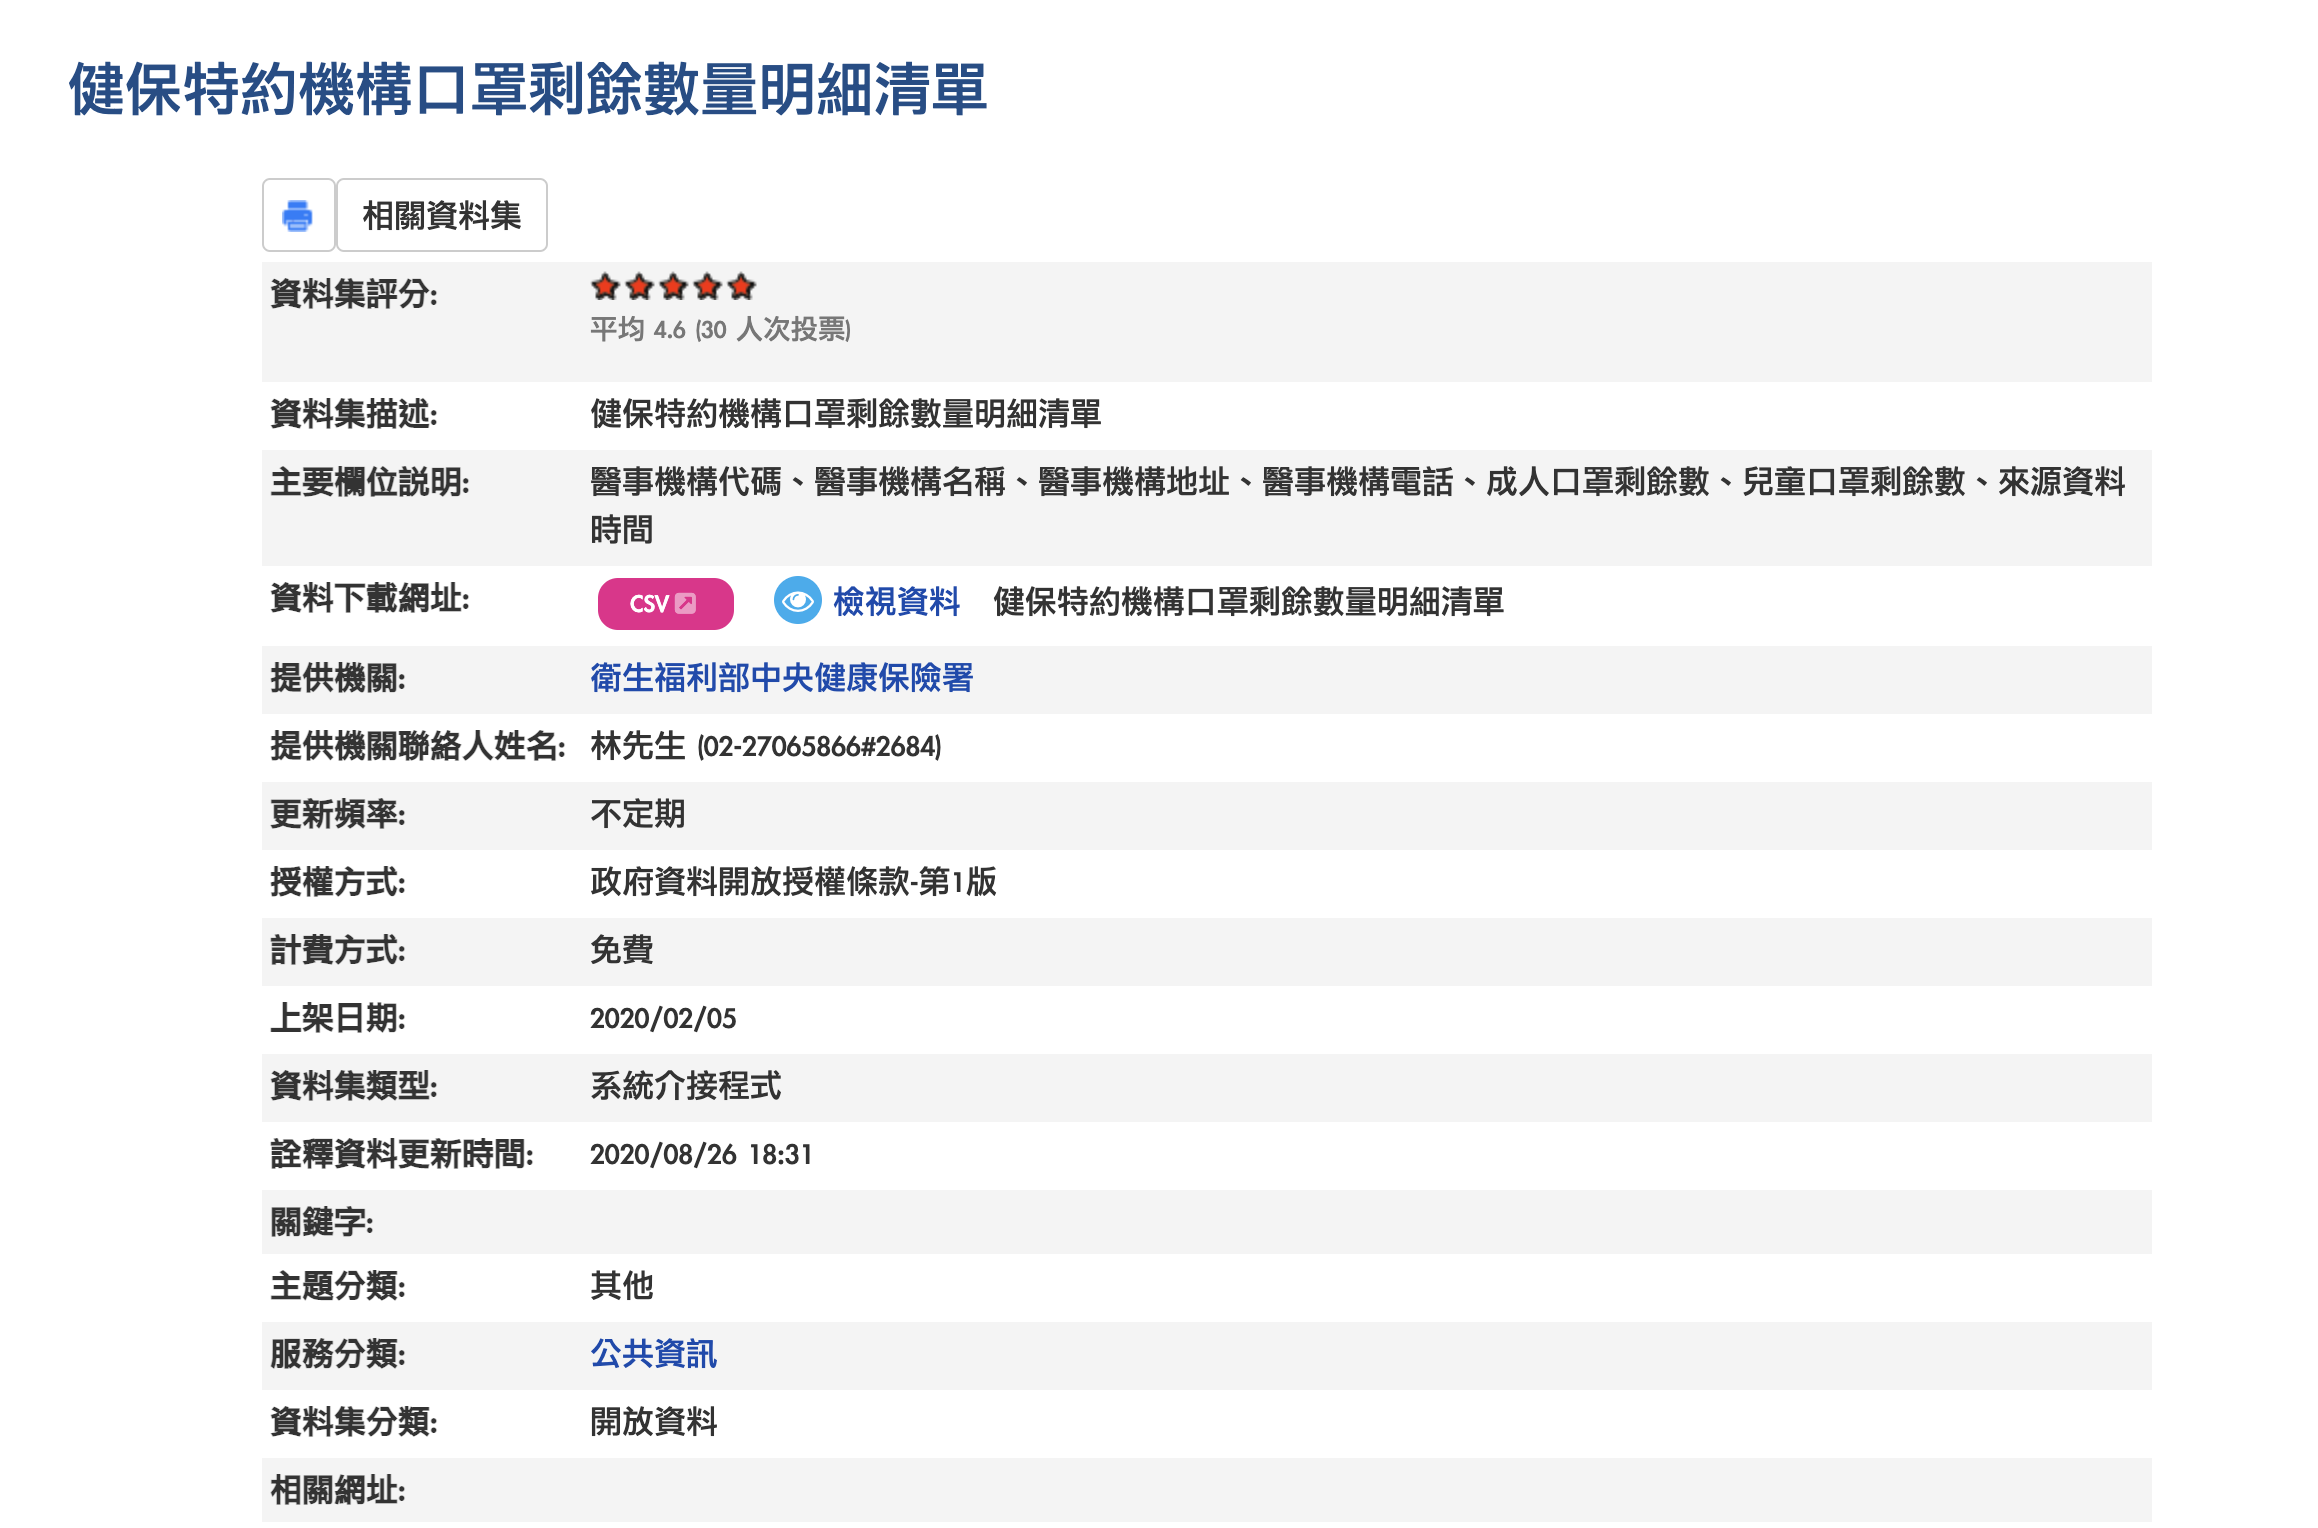
當時因為口罩短缺,導致各地藥局的口罩一度供不應求,政府為確保民眾均能安心且公平購買口罩的機會,臺灣自2020年2月6日起實施「口罩實名」販售制,民眾可憑健保卡至全國各地的健保特約藥局及衛生所購買口罩。為了讓民眾即時查找所在區域的口罩剩餘情形,健保署釋出口罩庫存量及特約藥局與衛生所資訊等開放資料,而當時民間口罩資訊的應用已知有超過 140 種口罩地圖的應用。
透過 OpenData 結合技術推廣,能夠讓更多人接觸開源領域,關心參與公民防疫,即便疫情尚未降溫,這也是令我感到開心且意外的收穫。 雖然在 2021 年的今日,台灣的口罩數量已經不再短缺,但全世界依舊籠罩在疫情的威脅下。
此時我選擇將這個範例寫進書中,除了作為教學使用外,也算是為這起事件留下一點小小的紀錄。
小提醒
以下範例使用的 API 為實際即時資訊,根據過往經驗,每逢週日的時候由於多數藥局無營業,所以 API 回傳的藥局資訊量比平常銳減為正常現象。
# 環境設定
在這個範例中,我們採用本書第三章所介紹過的 Vue CLI 來建立專案。 假設已經安裝好 Vue CLI,我們打開終端機並執行:
$ vue create mask-demo-app
接著版本的詢問我們選擇手動挑選: Manually select features
然後會循我們套件的選擇,這裡勾選
Vue CLI v4.5.10
? Please pick a preset: Manually select features
? Check the features needed for your project:
❯◉ Choose Vue version
 ◉ Babel
 ◯ TypeScript
 ◯ Progressive Web App (PWA) Support
 ◯ Router
 ◉ Vuex
 ◉ CSS Pre-processors
 ◯ Linter / Formatter
 ◯ Unit Testing
 ◯ E2E Testing
2
3
4
5
6
7
8
9
10
11
12
13
使用的 Vue.js 的版本當然選 3.x:
? Choose a version of Vue.js that you want to start the project with
  2.x
❯ 3.x (Preview)
2
3
CSS 預處理器的部分我們選擇 SASS, dart-sass 或 node-sass 皆可。
? Pick a CSS pre-processor (PostCSS, Autoprefixer and CSS Modules are supported by default):
❯ Sass/SCSS (with dart-sass)
  Sass/SCSS (with node-sass)
  Less
  Stylus
2
3
4
5
設定檔存放到 package.json:
? Where do you prefer placing config for Babel, ESLint, etc.?
  In dedicated config files
❯ In package.json
2
3
安裝完成後,根據你套件安裝管理,輸入
$ npm run serve
或者
$ yarn serve
即可開啟專案。
# 專案結構
建立好的專案,目錄結構大致上會是這個樣子:
├── README.md
├── babel.config.js
├── package.json
├── node_modules/
├── public/
│   ├── favicon.ico
│   └── index.html
├── src/
│   ├── App.vue
│   ├── assets/
│   │   └── logo.png
│   ├── components/
│   │   └── HelloWorld.vue
│   ├── main.js
│   └── store/
│       └── index.js
└── yarn.lock
2
3
4
5
6
7
8
9
10
11
12
13
14
15
16
17
這裡的檔案結構與我們在第三章介紹過的多了一個 store/index.js ,這就是 Vuex 的 store ,其他部分大同小異。
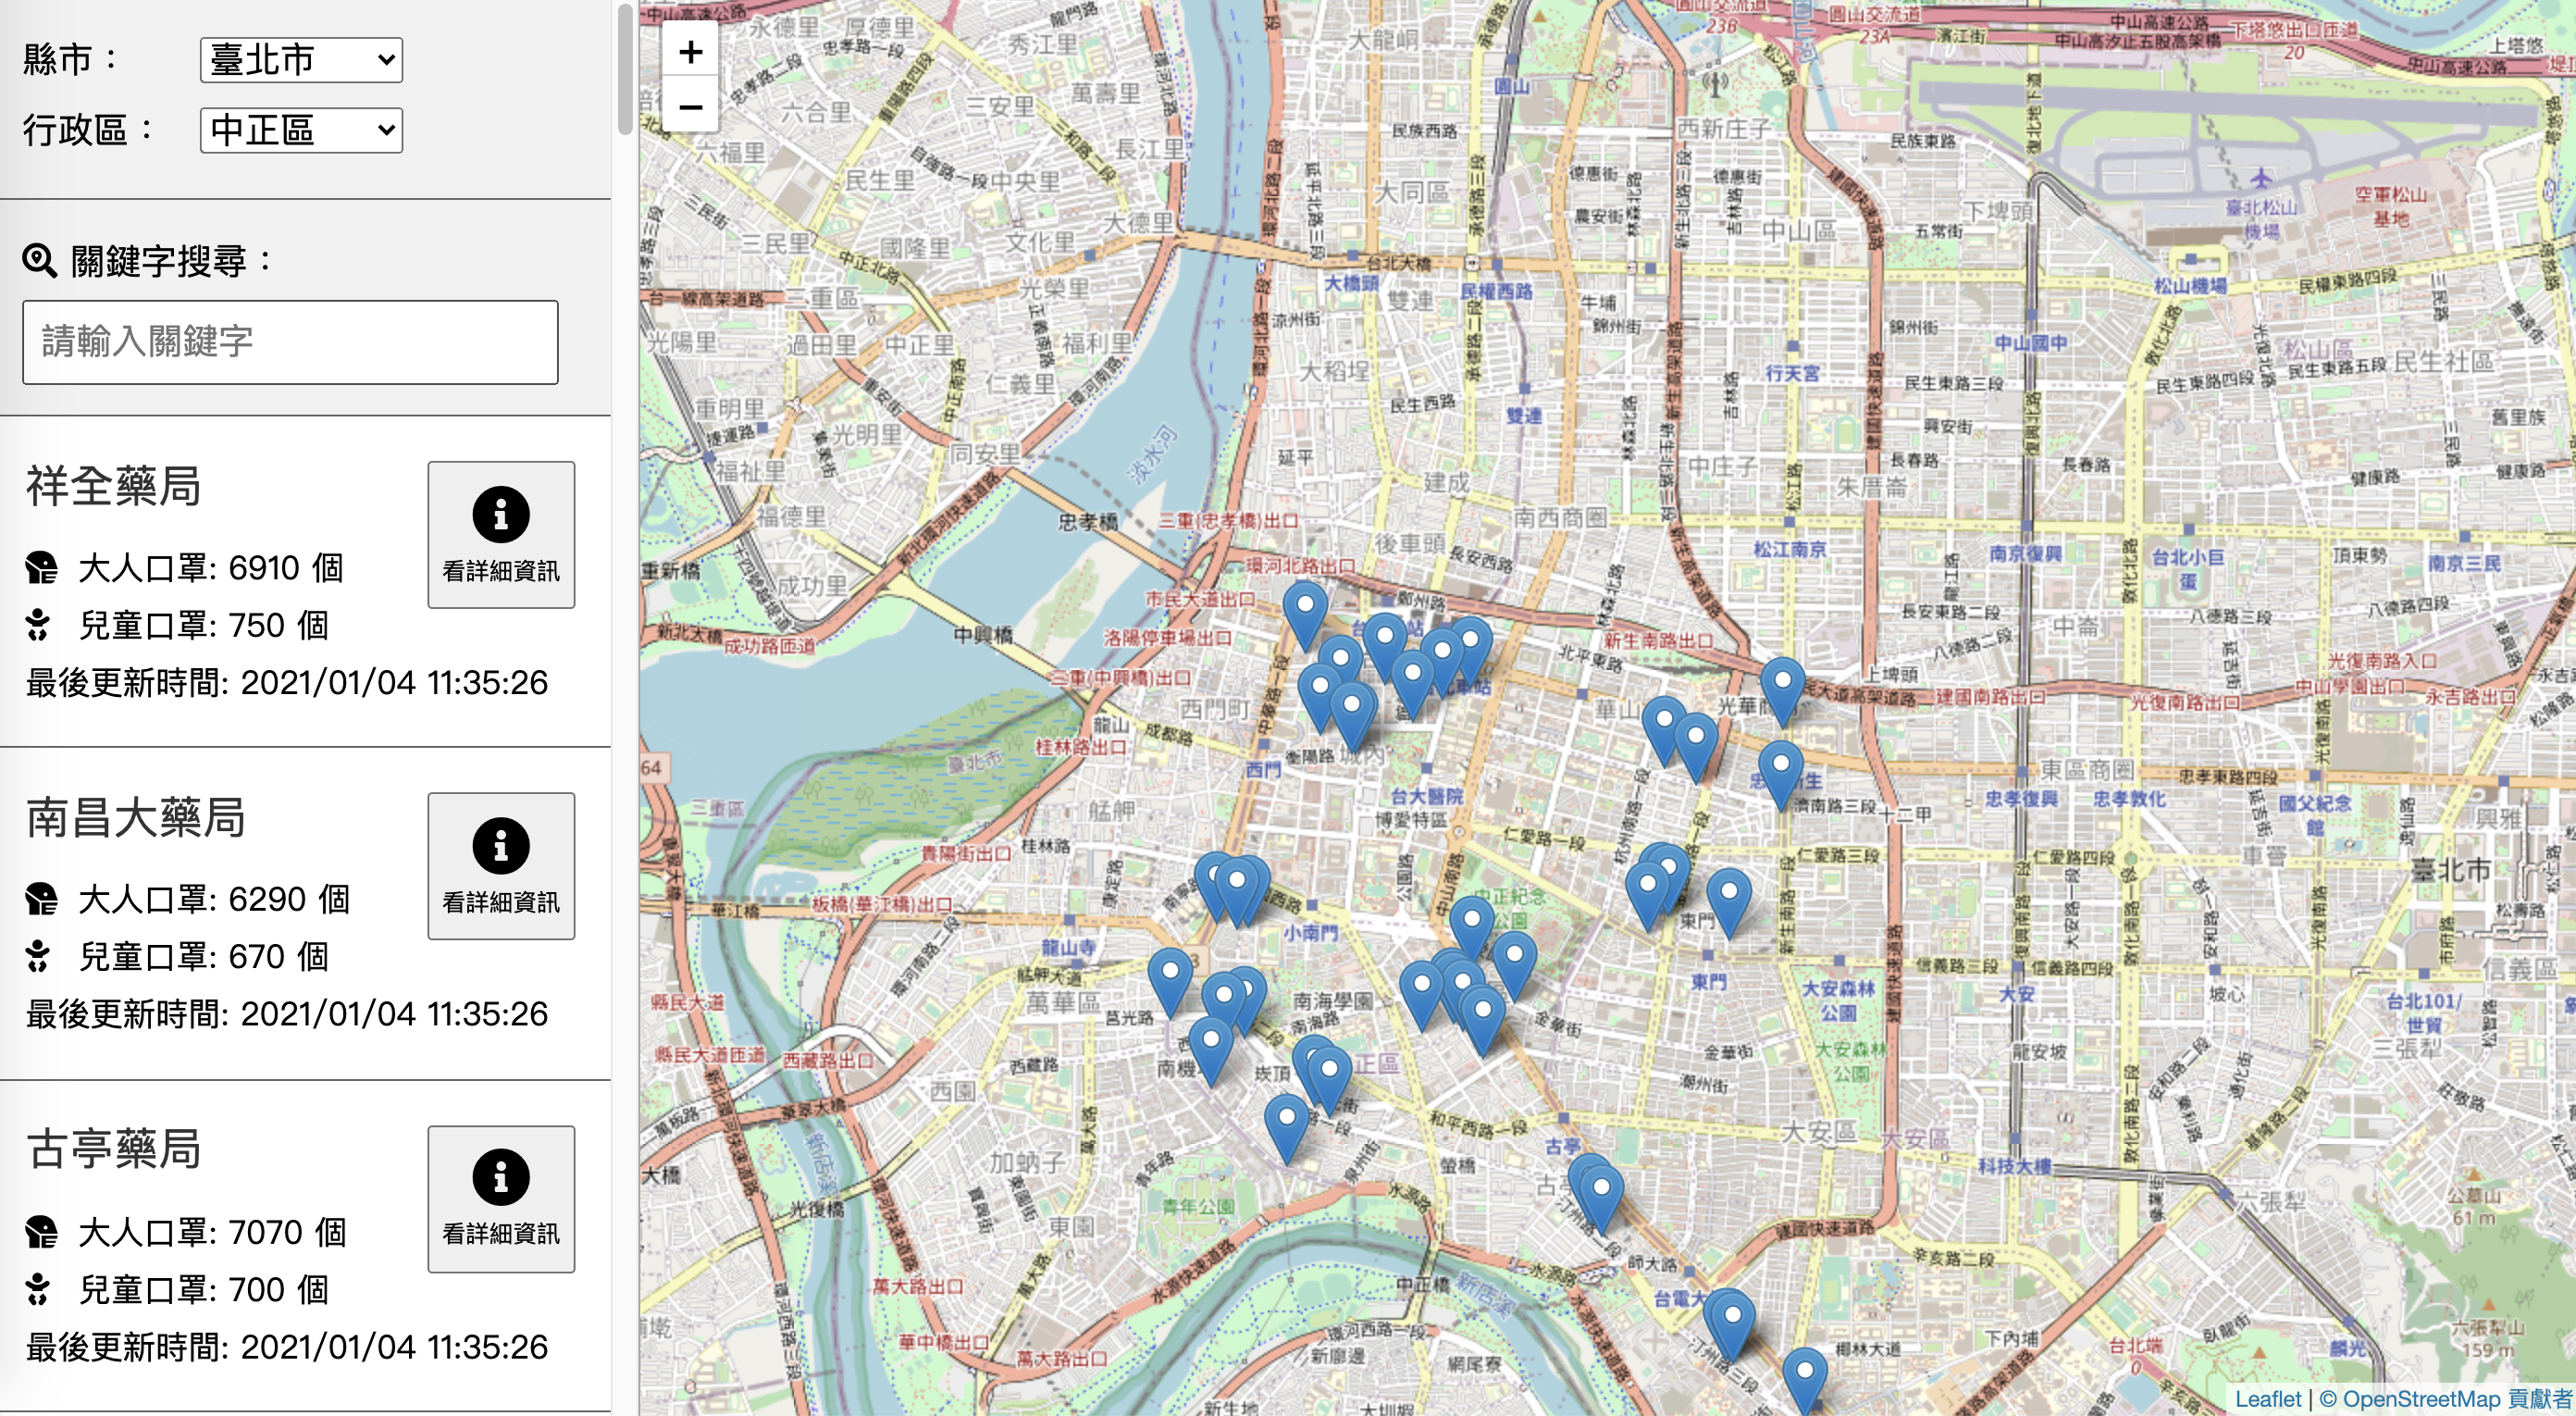
# 網頁元件結構
以這次的範例來說,我們可以將整個專案切分成三個主要的元件,
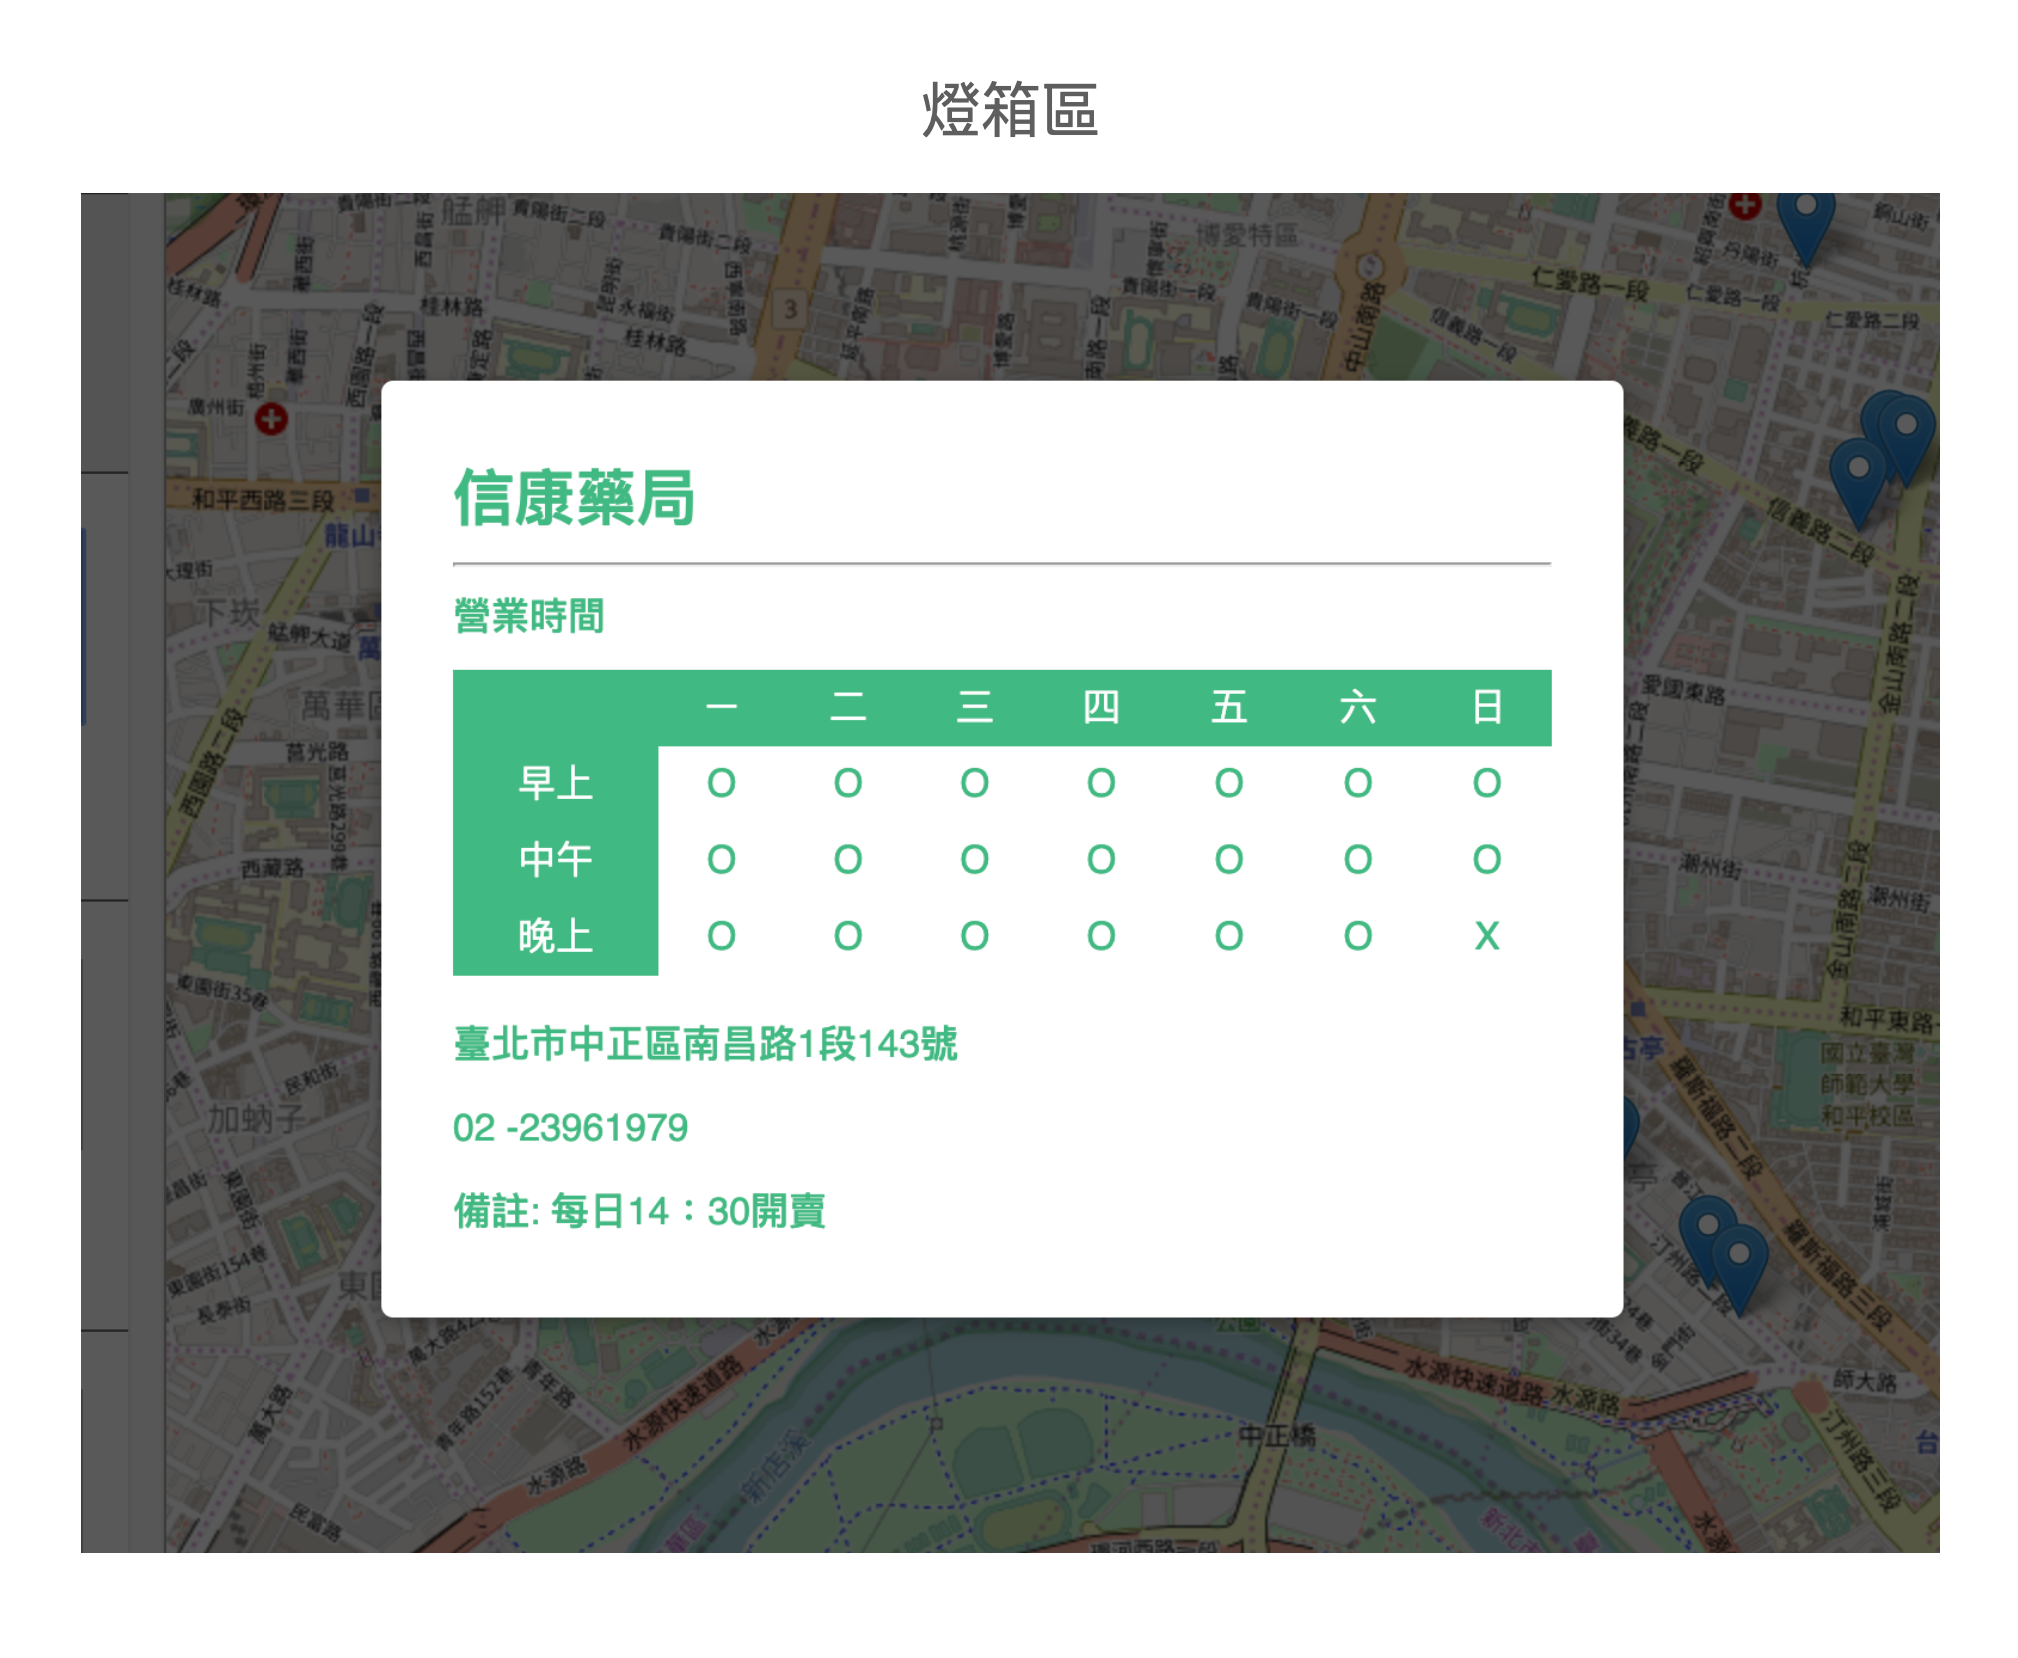
分別是主畫面的左側的列表、右側的地圖:
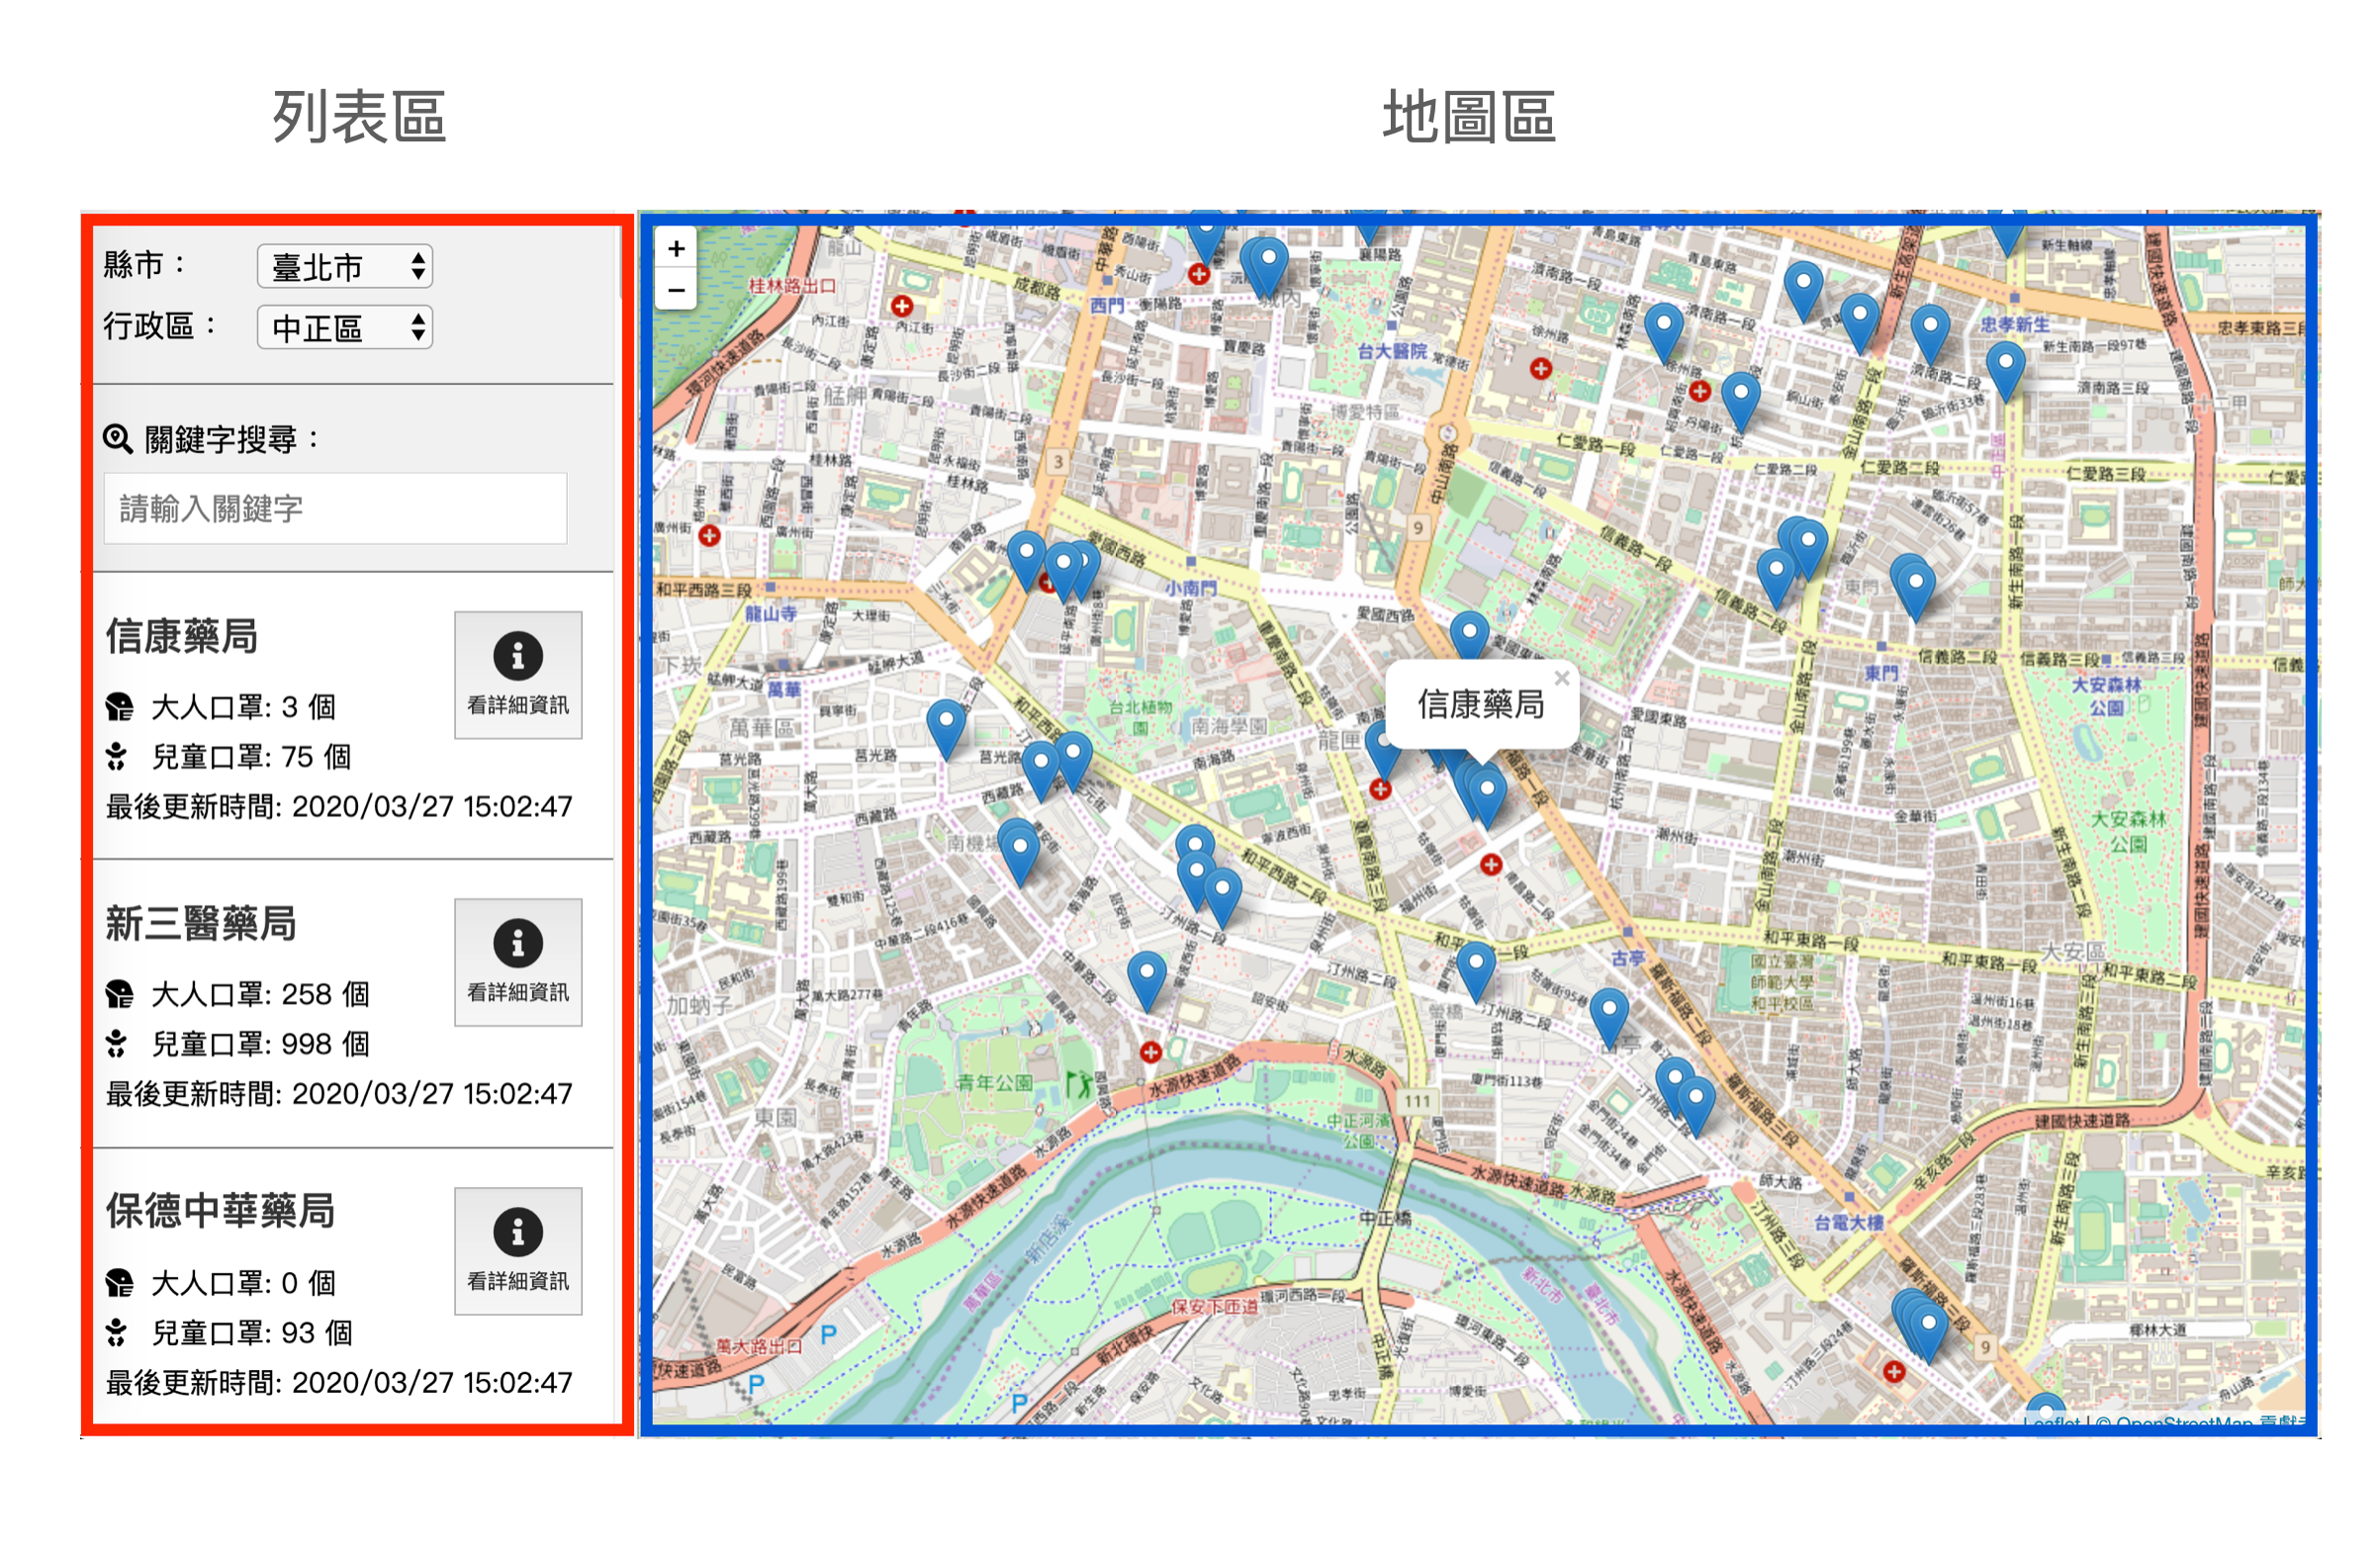
以及點擊標記後出現的燈箱:
專案的完整結果可以參考: https://kuro.tw/mask-map-demo/ (opens new window)。
# 建立基礎介面
首先我們開啟專案內的 /public/index.html,並在 <head>...</head> 加入所需的 CSS:
<!-- reset -->
<link rel="stylesheet" href="https://cdnjs.cloudflare.com/ajax/libs/meyer-reset/2.0/reset.min.css">
<!-- font-awesome -->
<link rel="stylesheet" href="https://cdnjs.cloudflare.com/ajax/libs/font-awesome/5.13.0/css/all.min.css">
<!-- leaflet -->
<link rel='stylesheet' href='https://unpkg.com/[email protected]/dist/leaflet.css'>
2
3
4
5
6
然後,改寫 src/App.vue 把用不到的地方清掉,並加上對應的 DOM,並且加入 style.scss。
<template>
  <div id="app">
    <!-- aside-menu 左側欄 -->
    <div class="aside-menu">
      <!-- 略,詳細模板內容請參考下方連結內 App.vue & style.scss -->
    </div>

    <!-- 地圖區塊 -->
    <div class="mask-map" id="mask-map"></div>
  </div>
</template>

<script>
export default {
  name: 'App',
}
</script>

<style lang="scss" src="./style.scss"></style>
2
3
4
5
6
7
8
9
10
11
12
13
14
15
16
17
18
19
為了不讓 HTML 與 CSS 內容佔據太大篇幅,基礎模板與 CSS 請讀者直接參考這份文件:https://tinyurl.com/008-vuex-demo-1 (opens new window)
(若不幸短網址失效可參考 https://gist.github.com/kurotanshi/348d2f044348a9e7aa8e24313267ca84 (opens new window) )
此時可以試著啟動 dev-server,我們的網頁應該會長這樣:
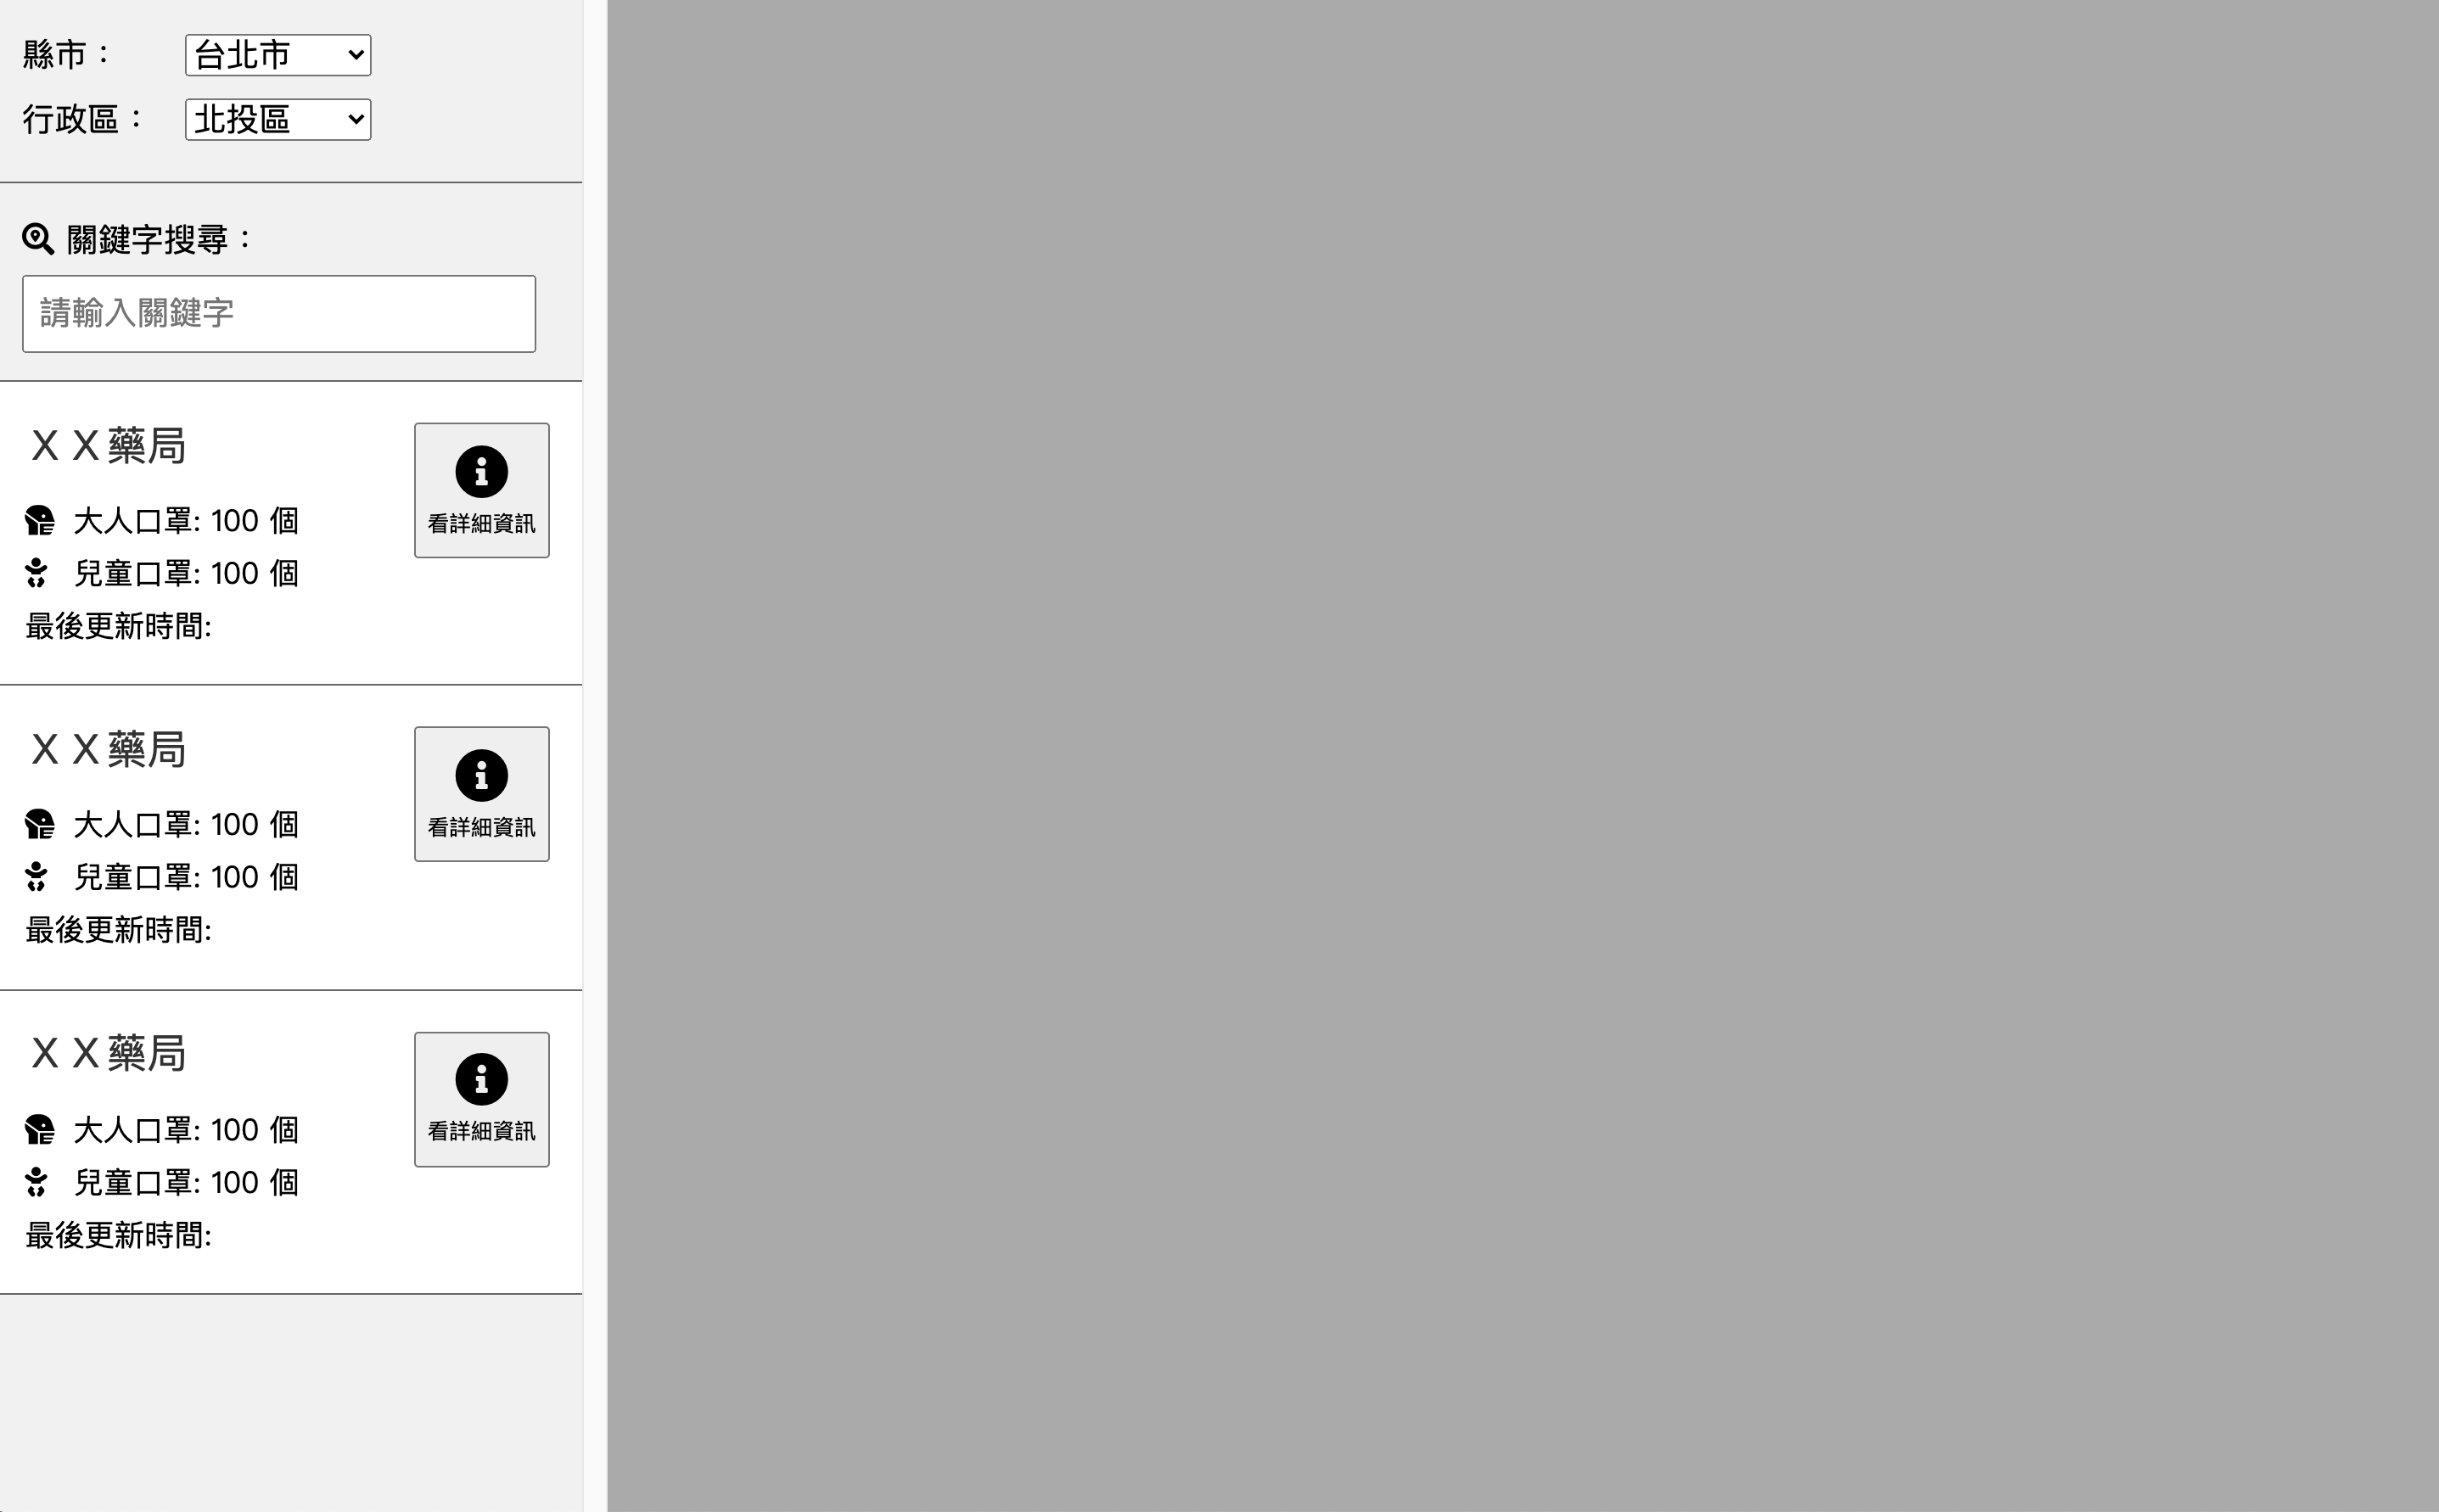
此時畫面什麼都沒有是正常的,因為我們到目前為止只把基礎模板樣式處理好而已,甚至連網頁的內容都是寫死的。
# 拆分元件 - asideMenu.vue
下一步就是要拆分元件了,先到 components/ 目錄下新增一個 asideMenu.vue 檔案,然後將前面在 App.vue 裡的 <div class="aside-menu"> … </div> 整塊搬過來,並且置放到 <template> 區塊:
<!-- asideMenu.vue -->
<template>
  <div class="aside-menu">
    <!-- 中間略 -->
  </div>
</template>

<script>
export default {
  name: 'asideMenu',
};
</script>
2
3
4
5
6
7
8
9
10
11
12
然後修改 App.vue 在模板內原本側欄的位置加入 <asideMenu /> ,並將剛剛建立的 asideMenu.vue import 進來:
<template>
  <div id="app">
    <!-- 側欄元件 -->
    <asideMenu />

    <!-- 地圖區塊 -->
    <div class="mask-map" id="mask-map"></div>
  </div>
</template>

<script>
import asideMenu from './components/asideMenu.vue';

export default {
  name: 'App',
  components: {
    asideMenu,
  },
}
</script>

<style lang="scss" src="./style.scss"></style>
2
3
4
5
6
7
8
9
10
11
12
13
14
15
16
17
18
19
20
21
22
這樣就拆好第一個元件了,而且執行的結果跟剛剛一模一樣。
# 取得縣市 & 行政區資料
在建立好基本外觀介面之後,第一件事就要來處理藥局的 縣市/行政區 選單。
首先打開 Vuex store/index.js,修改 state 的內容:
state: {
  // 使用者目前所選縣市, 預設值為 臺北市
  currCity: '臺北市',
  // 使用者目前所選行政區, 預設值為 北投區
  currDistrict: '北投區',
  // 存放 API 回傳的 縣市/行政區的列表資訊
  location: [],
  // 存放 API 回傳的所有藥局資訊
  stores: [],
},
2
3
4
5
6
7
8
9
10
這裏我們定義幾個狀態,分別是 currCity、currDistrict、location、stores。
前面說過,Vuex 的規定是只能從 mutations 來操作 state,所以先建立好各自對應的 mutation :
mutations: {
  setcurrCity(state, payload) {
    state.currCity = payload;
  },
  setcurrDistrict(state, payload) {
    state.currDistrict = payload;
  },
  setAreaLocation(state, payload) {
    state.location = payload;
  },
  setStores(state, payload) {
    state.stores = payload;
  },
},
2
3
4
5
6
7
8
9
10
11
12
13
14
資料 API 的來源則是:
- 縣市與行政區的列表 API :
https://raw.githubusercontent.com/kurotanshi/mask-map/master/raw/area-location.json - 藥局資訊 API :
https://raw.githubusercontent.com/kiang/pharmacies/master/json/points.json
接著,我們透過上面提供的兩個 JSON 檔案來取得資料並存入 state 裡。
在 actions 新增 fetchLocations 與 fetchPharmacies,我們透過這兩個 actions 來取得資料:
actions: {
  // 取得行政區資料
  async fetchLocations({ commit }) {
    const json = await fetch('https://raw.githubusercontent.com/kurotanshi/mask-map/master/raw/area-location.json')
      .then((res) => res.json());

    // 透過 commit 來操作 mutations
    commit('setAreaLocation', json);
  },
  // 取得藥局資料
  async fetchPharmacies({ commit }) {
    const json = await fetch('https://raw.githubusercontent.com/kiang/pharmacies/master/json/points.json')
      .then((res) => res.json());

    // 整理資料格式,拆出經緯度
    const data = json.features.map((d) => ({
      ...d.properties,
      latitude: d.geometry.coordinates[0],
      longitude: d.geometry.coordinates[1],
    }));

    // 透過 commit 來操作 mutations
    commit('setStores', data);
  },
},
2
3
4
5
6
7
8
9
10
11
12
13
14
15
16
17
18
19
20
21
22
23
24
25
這時就可以回到 App.vue 新增 mounted hook,並且利用上個小節介紹的 mapActions :
import { mapActions } from 'vuex';
import asideMenu from './components/asideMenu.vue';

export default {
  name: 'App',
  components: {
    asideMenu,
  },
  methods: {
    ...mapActions(['fetchLocations', 'fetchPharmacies'])
  },
  mounted () {
    this.fetchLocations();
    this.fetchPharmacies();
  }
}
2
3
4
5
6
7
8
9
10
11
12
13
14
15
16
現在,我們可以打開瀏覽器的開發者工具確認是否有發送遠端請求:
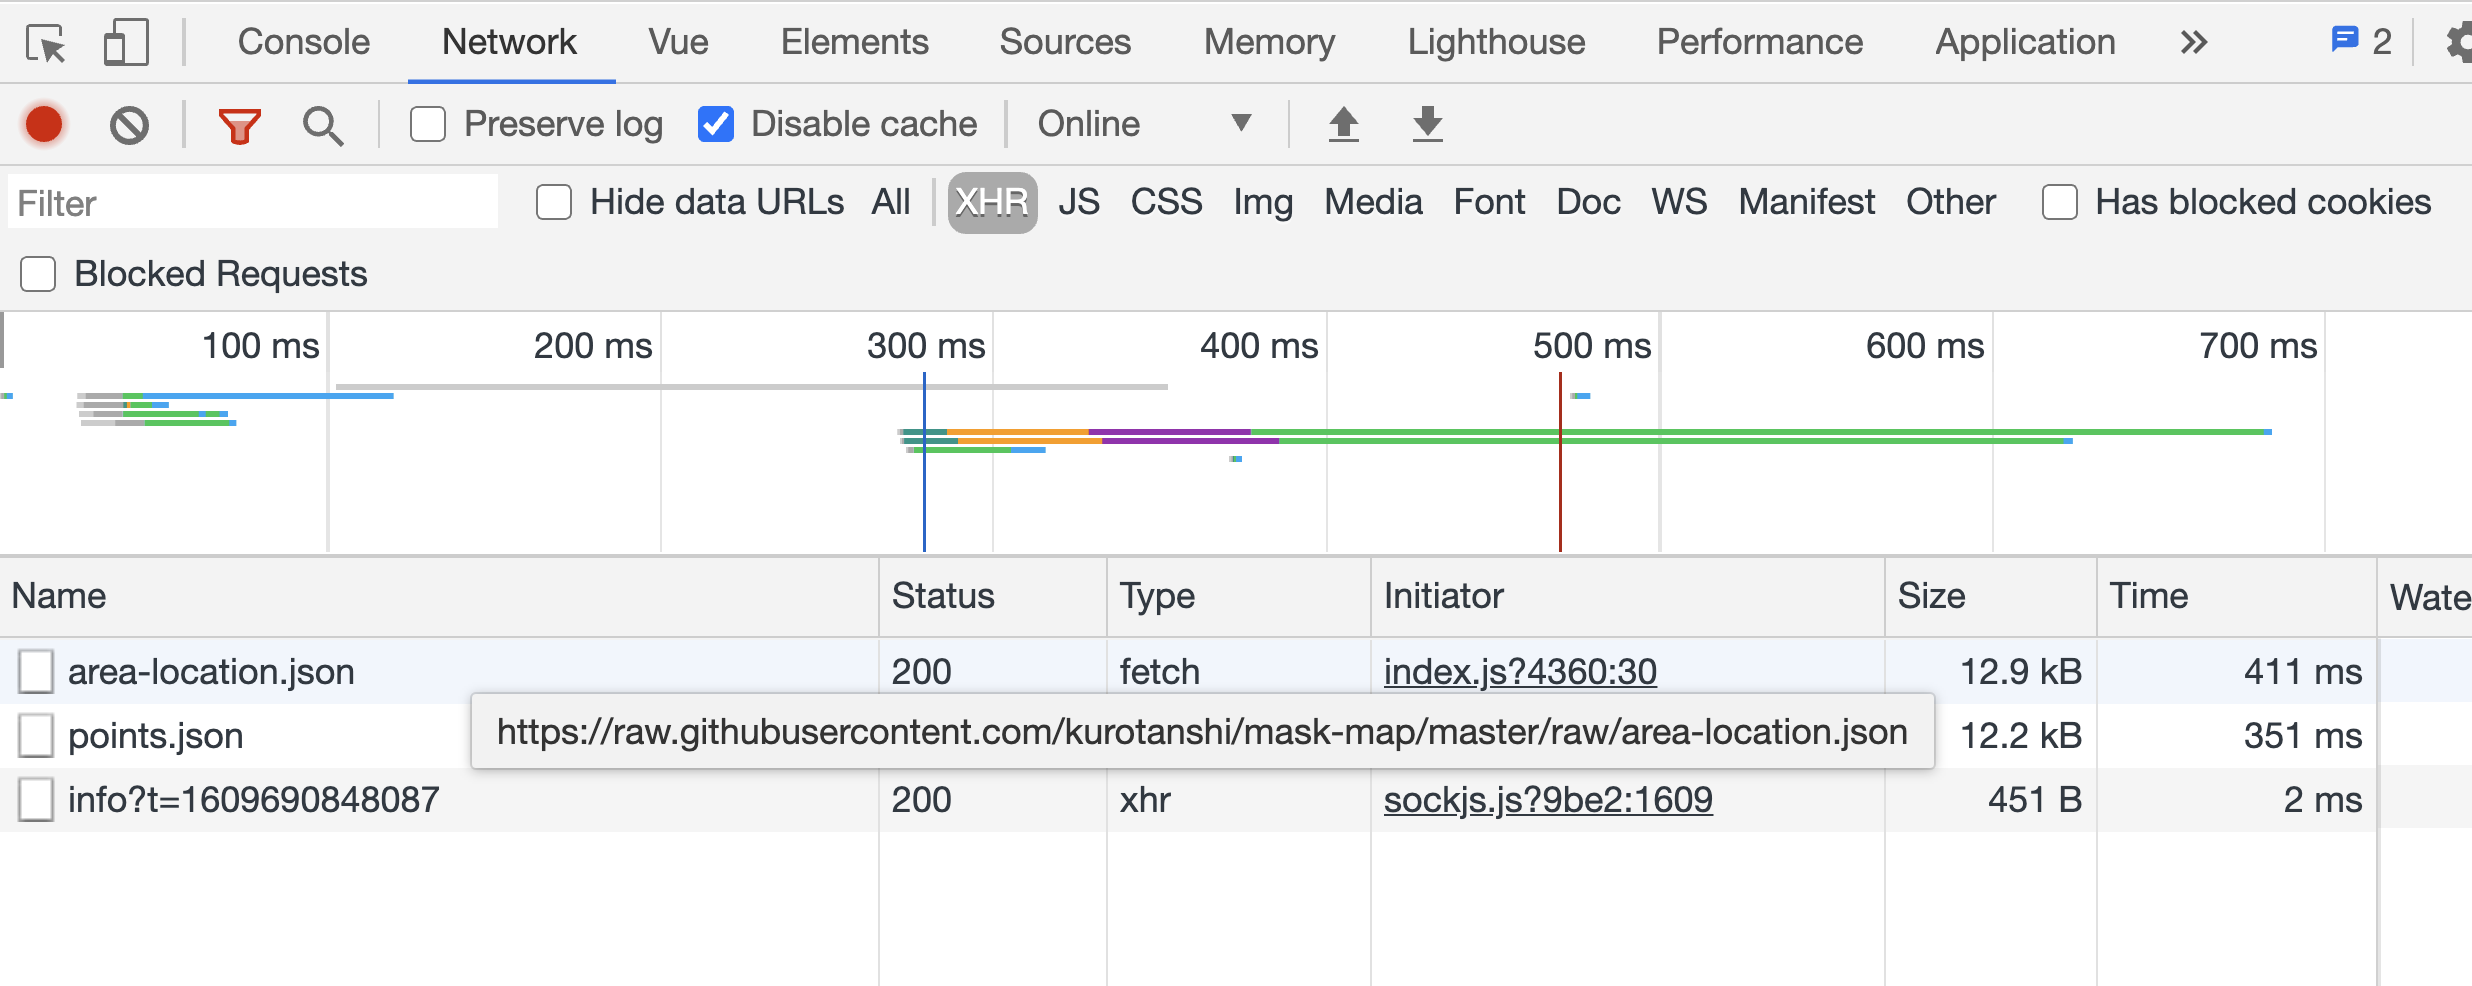
像上圖,我們可以透過開發者工具確認是否正確取得 area-location.json 與 points.json。
這樣就可以在 mounted 階段分別取得行政區與藥局的資訊了。
# 將行政區套用至左側選單
取回行政區的資訊之後,下一步我們就要將這份列表套用左側的兩個下拉選單中。
打開 src/components/asideMenu.vue ,並新增 computed 以便取得我們存放在 state 內的資料。
這裏由於我們要直接將 currCity 與 currDistrict 透過 v-model 指令來與下拉選單做雙向綁定,
所以需要在 computed 加上 get 與 set:
computed: {
  currCity: {
    get() {
      return this.$store.state.currCity;
    },
    set(value) {
      this.$store.commit('setcurrCity', value);
    },
  },
  currDistrict: {
    get() {
      return this.$store.state.currDistrict;
    },
    set(value) {
      this.$store.commit('setcurrDistrict', value);
    },
  }
},
2
3
4
5
6
7
8
9
10
11
12
13
14
15
16
17
18
並改寫 asideMenu.vue 模板內的選單部分:
<div class="wraps">
  <label>
    縣市:<select v-model="currCity">
      <option>臺北市</option>
    </select>
  </label>

  <label>
    行政區:<select v-model="currDistrict">
      <option>北投區</option>
    </select>
  </label>
</div>
2
3
4
5
6
7
8
9
10
11
12
13
這樣一來,當使用者更新 <select> 表單狀態時,v-model 就可以透過 computed 的 set 將使用者所選的項目 commit 回 Vuex 的 store 了。
完成後,接著來處理 <options> 內的資料。
但此時我們發現,由於 state 內的行政區資料是這樣的階層式資料:
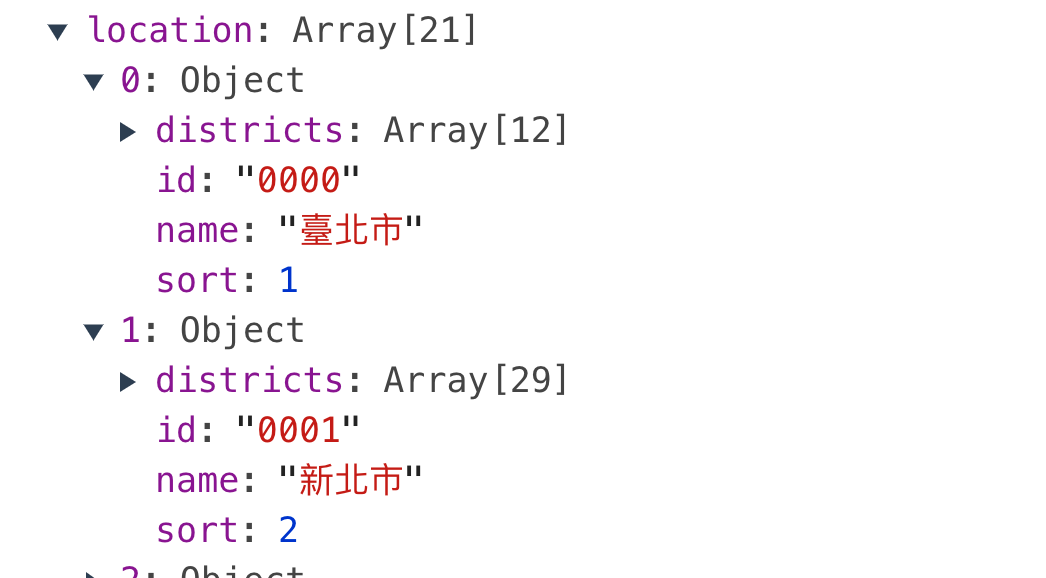
並不適合直接用 v-for 來做渲染,所以我們回到 store/index.js ,並新增 getters 來處理資料:
getters: {
  cityList(state) {
    // 城市
    return state.location.map((d) => d.name);
  },
  districtList(state) {
    // 行政區, 利用 Optional Chaining 處理預設值問題
    return state.location.find((d) => d.name === state.currCity)?.districts || [];
  },
},
2
3
4
5
6
7
8
9
10
這裏我們用 .map() 與 .find() 分別取出我們想要的資料。
然後就可以回到 asideMenu.vue,修改 computed 並新增 mapGetters :
computed: {
  currCity: {
    // 略
  },
  currDistrict: {
    // 略
  },
  ...mapGetters(['cityList', 'districtList'])
},
2
3
4
5
6
7
8
9
我們就可以再次改寫選單將 v-for 加到 <option> :
<label>
  縣市:<select v-model="currCity">
    <option v-for="c in cityList" :key="c">{{ c }}</option>
  </select>
</label>

<label>
  行政區:<select v-model="currDistrict">
    <option v-for="d in districtList" :key="d.id">{{ d.name }}</option>
  </select>
</label>
2
3
4
5
6
7
8
9
10
11
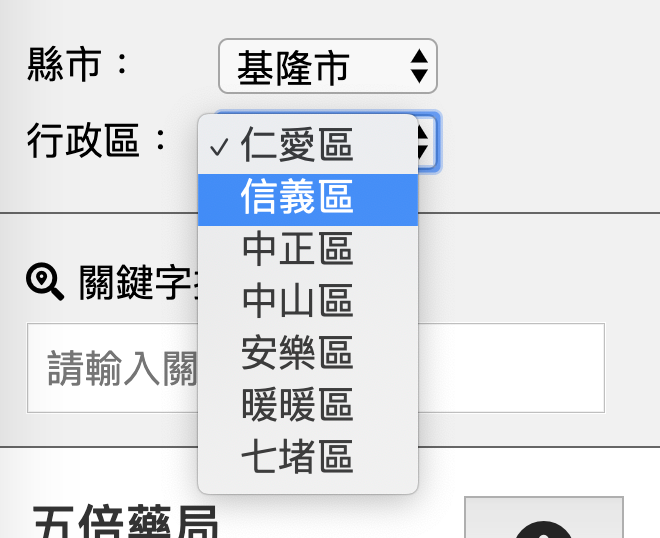
這個時候我們的選單就長出來了。
另外,如果我們想要在使用者更新縣市的時候,自動切換到第一個行政區時,可以在 asideMenu.vue 加入 watch :
watch: {
  districtList(v) {
    const [arr] = v;
    this.currDistrict = arr.name;
  },
},
2
3
4
5
6
這樣當 districtList 更新的時候,我們的 this.currDistrict 就會自動變成新的行政區列表的第一個了。
# 將藥局資料套用至左側列表
處理完縣市行政區的下拉選單後,接著來處理藥局資料。
跟剛剛一樣,我們在 asideMenu.vue 的 computed 裡面取回 stores:
computed: {
  currCity: {
    // 略
  },
  currDistrict: {
    // 略
  },
  ...mapState(['stores']),
  ...mapGetters(['cityList', 'districtList']),
},
2
3
4
5
6
7
8
9
10
接著用 v-for 來改寫模板內列表 <li class="store-info"> 區塊:
<ul class="store-lists">
  <li class="store-info wraps" v-for="s in stores" :key="s.id">
    <h1>{{ s.name }}</h1>

    <div class="mask-info">
      <i class="fas fa-head-side-mask"></i>
      <span>大人口罩: {{ s.mask_adult }} 個</span>
    </div>

    <div class="mask-info">
      <i class="fas fa-baby"></i>
      <span>兒童口罩: {{ s.mask_child }} 個</span>
    </div>

    <div class="mask-info">
      最後更新時間: {{ s.updated }}
    </div>

    <button class="btn-store-detail">
      <i class="fas fa-info-circle"></i>
      看詳細資訊
    </button>
  </li>
</ul>
2
3
4
5
6
7
8
9
10
11
12
13
14
15
16
17
18
19
20
21
22
23
24
這個時候,乍看之下已經有資料出現,但因為全台的藥局一共有六千多筆,整個網頁的效能會被嚴重拖垮。
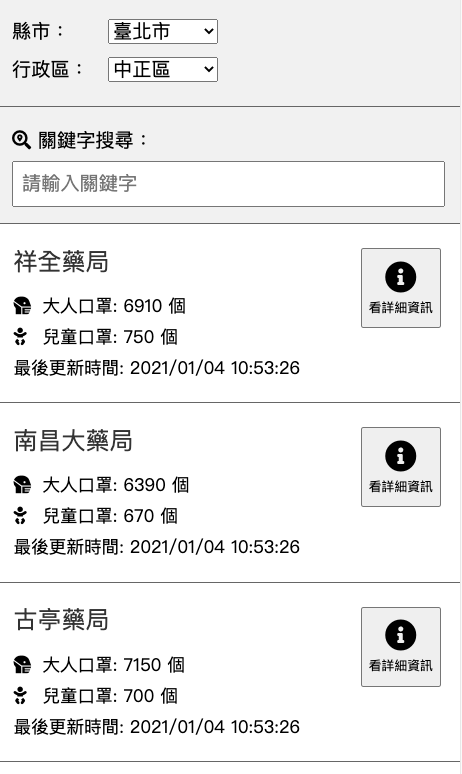
所以我們還需要加上與縣市行政區下拉選單連動過濾的功能。
回到 store/index.js ,我們加上 getters 來處理過濾後的藥局清單:
filteredStores(state) {
  // 依縣市、行政區分組
  const { stores } = state;
  return stores.filter((d) => d.county === state.currCity && d.town === state.currDistrict);
},
2
3
4
5
同時, asideMenu.vue 裡面也將剛剛 computed 的 stores 改寫成 filteredStores。
computed: {
  currCity: {
    // 略
  },
  currDistrict: {
    // 略
  },
  // 移除 ...mapState(['stores'])
  // 新增 filteredStores
  ...mapGetters(['cityList', 'districtList', 'filteredStores']),
},
2
3
4
5
6
7
8
9
10
11
然後將 v-for="s in stores" 改成 v-for="s in filteredStores",其他部分不變:
<li class="store-info wraps" v-for="s in filteredStores" :key="s.id">
此時當我們切換縣市或行政區時,下方的藥局清單也會隨著同步更新了。
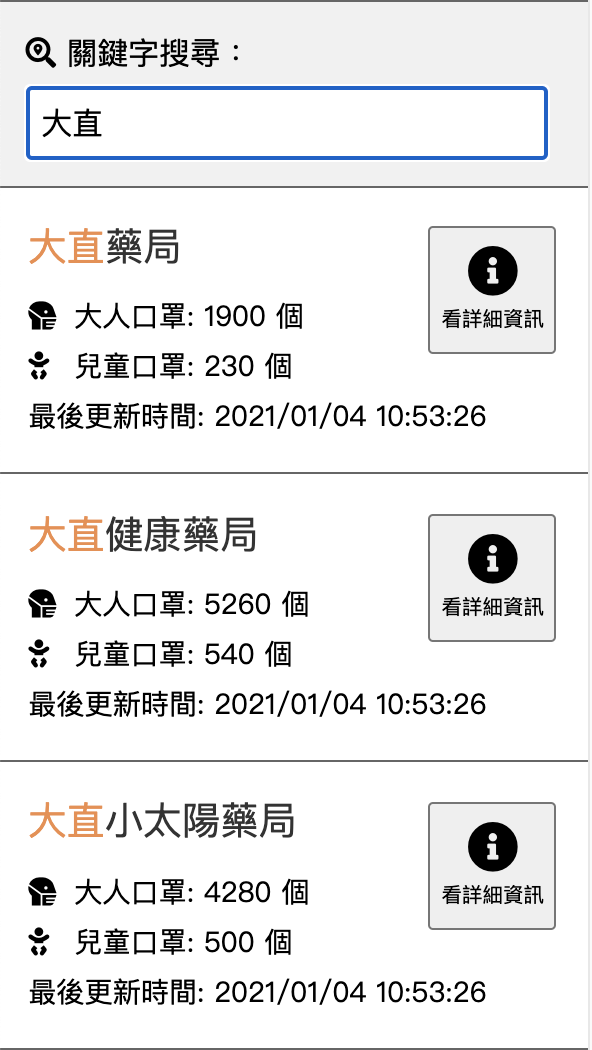
# 藥局列表與關鍵字搜尋連動
完成了縣市或行政區的切換後,接著來處理關鍵字的搜尋。
同樣地,我們在 store/index.js 裡的 state 新增一個 keywords 欄位:
state: {
  currCity: '臺北市',
  currDistrict: '北投區',
  location: [],
  stores: [],
  keywords: '',
},
2
3
4
5
6
7
並且加上對應的 mutations:
setKeywords(state, payload) {
  state.keywords = payload;
},
2
3
且同樣在 asideMenu.vue 新增對應的 computed 屬性:
keywords: {
  get() {
    return this.$store.state.keywords;
  },
  set(value) {
    this.$store.commit('setKeywords', value);
  },
},
2
3
4
5
6
7
8
將 keywords 與 input 輸入框用 v-model 綁定:
<div class="wraps">
  <label>
    <i class="fas fa-search-location"></i> 關鍵字搜尋:
    <input type="text" placeholder="請輸入關鍵字" v-model="keywords">
  </label>
</div>
2
3
4
5
6
接著改寫 vuex getters 的 filteredStores:
filteredStores(state) {
  // 依縣市、行政區分組
  const { stores } = state;

  // 加入關鍵字判斷功能
  return state.keywords
    ? stores.filter((d) => d.name.includes(state.keywords))
    : stores.filter((d) => d.county === state.currCity && d.town === state.currDistrict);
},
2
3
4
5
6
7
8
9
加上 state.keywords 判斷,當使用者有輸入關鍵字的情況下,無視縣市區的分組條件,以免結果太少。
最後,增強使用者體驗,我們在 asideMenu.vue 新增一組 keywordHighlight 的 method,讓符合的關鍵字有 highlight 的效果:
methods: {
  keywordHighlight(val) {
    return val.replace(new RegExp(this.keywords, 'g'), `<span class="highlight">${this.keywords}</span>`);
  },
},
2
3
4
5
並將列表內的 <h1> 改寫:
<h1 v-html="keywordHighlight(s.name)"></h1>
然後在元件內新增 .highlight 樣式:
.highlight {
  color: #f08d49;
}
2
3
# 「看詳細資訊」對話框 - lightbox.vue
首先在 src/components 目錄下新增 lightbox.vue 檔案:
(完整 lightbox.vue 檔案請參考 https://tinyurl.com/008-vuex-demo-2 (opens new window) 或是 https://gist.github.com/kurotanshi/e583f2051a5eb1ffc3191252b315bdd1 (opens new window) )
<template>
  <transition name="modal">
    <div class="modal-mask" v-show="showModal">
      <!-- 為了可以關閉燈箱,加上 @click.self="close" -->
      <div class="modal-wrapper" @click.self="close">

        <div class="modal-container">
          <div class="modal-body">
            <!-- 內容放這裡,先隨便放個 Hello -->
            <div>Hello</div>
          </div>
        </div>

      </div>
    </div>
  </transition>
</template>

<script>
export default {
  name: 'Lightbox',
  computed: {
    showModal: {
      get() {
        return this.$store.state.showModal;
      },
      set(value) {
        this.$store.commit('setshowModal', value);
      },
    },
  },
  methods: {
    close() {
      this.showModal = false;
    },
  },
};
</script>

<style scoped lang="scss">
/* 略 */
</style>
2
3
4
5
6
7
8
9
10
11
12
13
14
15
16
17
18
19
20
21
22
23
24
25
26
27
28
29
30
31
32
33
34
35
36
37
38
39
40
41
42
同樣地,我們在 vuex store 裡面新增一個 showModal 用來表示開對話框與否的狀態:
state: {
  currCity: '臺北市',
  currDistrict: '北投區',
  location: [],
  stores: [],
  keywords: '',
  showModal: false,      // 預設 false
},
2
3
4
5
6
7
8
並加入對應的 mutations :
setshowModal(state, payload) {
  state.showModal = payload;
},
2
3
完成後,我們修改 App.vue,加入 lightBox.vue:
<template>
  <div id="app">
    <aside-menu />
    <div class="mask-map" id="mask-map"></div>

    <light-box />
  </div>
</template>

<script>
import { mapActions } from 'vuex';
import asideMenu from './components/asideMenu.vue';
import lightBox from './components/lightbox.vue';

export default {
  name: 'App',
  components: {
    asideMenu,
    lightBox
  },
  methods: {
    ...mapActions(['fetchLocations', 'fetchPharmacies'])
  },
  mounted () {
    this.fetchLocations();
    this.fetchPharmacies();
  }
}
</script>

<style lang="scss" src="./style.scss"></style>
2
3
4
5
6
7
8
9
10
11
12
13
14
15
16
17
18
19
20
21
22
23
24
25
26
27
28
29
30
31
因為要在側欄列表控制 Modal 的開關,所以再回到 asideMenu.vue 新增對應的 computed 屬性 showModal:
showModal: {
  get() {
    return this.$store.state.showModal;
  },
  set(value) {
    this.$store.commit('setshowModal', value);
  },
},
2
3
4
5
6
7
8
以及相關的 methods :
openInfoBox() {
  this.showModal = true;
},
2
3
並且在 「看詳細資訊」 按鈕加上 click 事件:
<button class="btn-store-detail" @click="openInfoBox()">
  <i class="fas fa-info-circle"></i>
  看詳細資訊
</button>
2
3
4
這時候點擊任一個按鈕,會看到燈箱彈出 Hello 的訊息。
再來,我們修改一下 lightBox.vue 的內容,讓每一個對話框都只出現各自的藥局資訊。
首先修改模板內 modal-body 內的 HTML:
<div class="modal-body">
  <h1 class="store-name">藥局名稱</h1>
  <hr>
  <h2 class="title">營業時間</h2>
  <table>
    <thead>
      <tr>
        <th></th>
        <th>ㄧ</th>
        <th>二</th>
        <th>三</th>
        <th>四</th>
        <th>五</th>
        <th>六</th>
        <th>日</th>
      </tr>
    </thead>
    <tbody>
      <tr>
        <th>早上</th>
        <td></td>
        <td></td>
        <td></td>
        <td></td>
        <td></td>
        <td></td>
        <td></td>
      </tr>
      <tr>
        <th>中午</th>
        <td></td>
        <td></td>
        <td></td>
        <td></td>
        <td></td>
        <td></td>
        <td></td>
      </tr>
      <tr>
        <th>晚上</th>
        <td></td>
        <td></td>
        <td></td>
        <td></td>
        <td></td>
        <td></td>
        <td></td>
      </tr>
    </tbody>
  </table>

  <h2 class="title">地址 XXXXXXX</h2>
  <h2 class="title">電話 XXXXXXX</h2>
  <h2 class="title">備註 XXXXXXX</h2>
</div>
2
3
4
5
6
7
8
9
10
11
12
13
14
15
16
17
18
19
20
21
22
23
24
25
26
27
28
29
30
31
32
33
34
35
36
37
38
39
40
41
42
43
44
45
46
47
48
49
50
51
52
53
54
55

接下來我們要思考的是,怎麼從列表取得對應的藥局資訊並置入燈箱元件。
為此,我們在 Vuex 的 state 新增一個 infoBoxSid ,用來表示目前對話框對應的藥局 id。
state: {
  currCity: '臺北市',
  currDistrict: '北投區',
  location: [],
  stores: [],
  keywords: '',
  showModal: false,
  infoBoxSid: null,
},
2
3
4
5
6
7
8
9
同樣在 mutations 加上更新的方法:
setInfoBoxSid(state, payload) {
  state.infoBoxSid = payload;
},
2
3
接著,在 lightbox.vue 與 asideMenu.vue 分別都加上對應的 computed 屬性:
infoBoxSid: {
  get() {
    return this.$store.state.infoBoxSid;
  },
  set(value) {
    this.$store.commit('setInfoBoxSid', value);
  },
},
2
3
4
5
6
7
8
改寫 asideMenu.vue 的 openInfoBox ,讓它可以帶入藥局 id:
openInfoBox(sid) {
  this.showModal = true;
  this.infoBoxSid = sid;
},
2
3
4
然後是模板與事件:
<button class="btn-store-detail" @click="openInfoBox(s.id)">
  <i class="fas fa-info-circle"></i>
  看詳細資訊
</button>
2
3
4
同時,在 lightbox.vue 的 computed 加上,就可以取得對應藥局的詳細資訊。
currStore() {
  return this.$store.state.stores.filter((d) => d.id === this.infoBoxSid)[0];
},
2
3
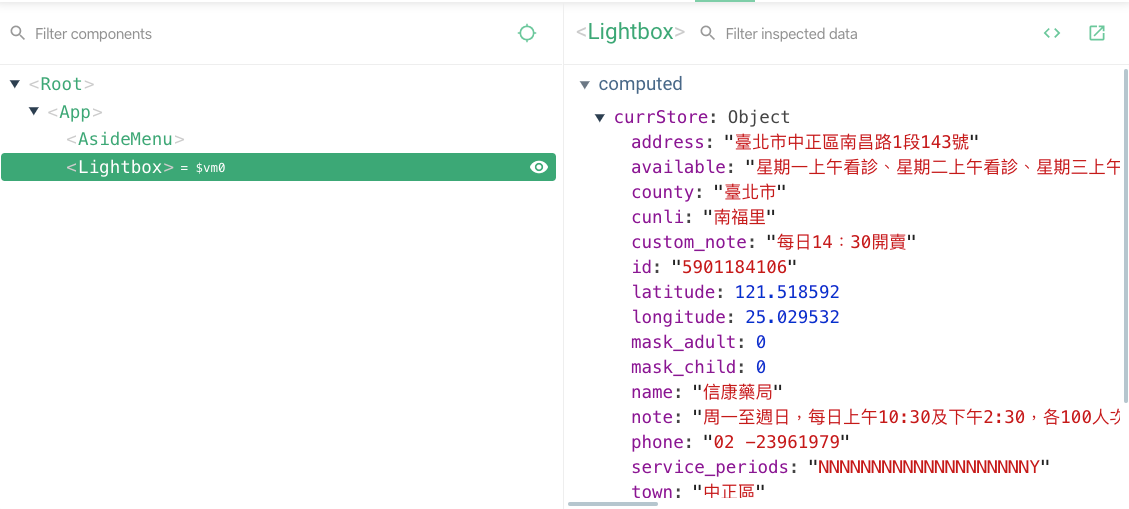
其中,藥局的營業時間存放在 service_periods 這個欄位。
為此,我們在 lightbox.vue 的 computed 加上 servicePeriods 將一連串的字串拆成我們所需的內容
servicePeriods() {
  let servicePeriods = this?.currStore?.['service_periods'] || '';
  servicePeriods = servicePeriods.replace(/N/g, 'O').replace(/Y/g, 'X');

  return servicePeriods
    ? [servicePeriods.slice(0, 7).split(''),
       servicePeriods.slice(7, 14).split(''),
       servicePeriods.slice(14, 21).split('')]
    : servicePeriods;
},
2
3
4
5
6
7
8
9
10
並修改燈箱內模板表格 <tbody> 部分,使用 v-for 來渲染:
<tbody>
  <tr>
    <th>早上</th>
    <td v-for="(s, idx) in servicePeriods[0]" :key="idx">{{s}}</td>
  </tr>
  <tr>
    <th>中午</th>
    <td v-for="(s, idx) in servicePeriods[1]" :key="idx">{{s}}</td>
  </tr>
  <tr>
    <th>晚上</th>
    <td v-for="(s, idx) in servicePeriods[2]" :key="idx">{{s}}</td>
  </tr>
</tbody>
2
3
4
5
6
7
8
9
10
11
12
13
14
與藥局相關資訊:
<!--
  將 <h1 class="store-name">藥局名稱</h1> 換成這個
-->
<h1 class="store-name">{{ currStore.name }}</h1>
2
3
4
<!--
  將
    <h2 class="title">地址 XXXXXXX</h2>
    <h2 class="title">電話 XXXXXXX</h2>
    <h2 class="title">備註 XXXXXXX</h2>
  換成這個
-->
<h2 class="title">地址: {{ currStore.address }}</h2>
<h2 class="title">電話: {{ currStore.phone }}</h2>
<h2 v-if="currStore.custom_note" class="title">備註: {{ currStore.custom_note }}</h2>
2
3
4
5
6
7
8
9
10
到此,對話框的部分就完成了。
若是因為一開始沒有 currStore 的情況下找不到 currStore.name,導致 console 主控台會出現警告,
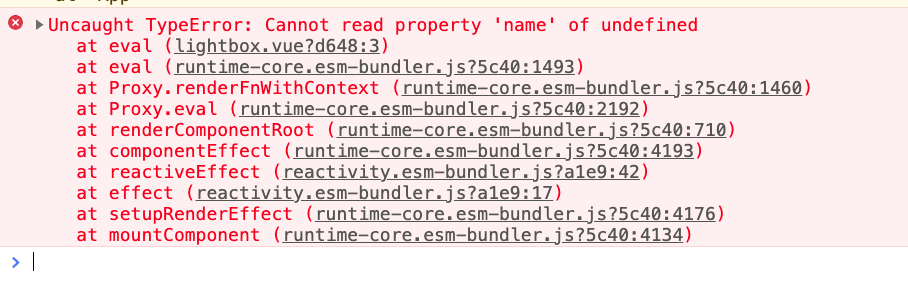
此時我們可以在 modal 加上 v-if 來繞過即可 <div class="modal-body" v-if="currStore"> 。
# 藥局地圖 - maskMap.vue
最後是右側地圖的部分,書中範例使用的是 Leaflet JS 與開放街圖 OpenStreetMap 做搭配。
Leaflet API 可參考: https://leafletjs.com/reference-1.7.1.html (opens new window)

首先回到終端機,按下 ctrl + c 來結束 yarn 或 npm script。
然後執行下面指令來安裝 leaflet 的相關套件
$ npm install leaflet

# 或 yarn add leaflet
2
3
再來同樣在 components/ 目錄下新增 maskMap.vue 檔案:
<template>
  <div class="mask-map" id="mask-map"></div>
</template>

<script>
export default {
  name: 'maskMap',
};
</script>
2
3
4
5
6
7
8
9
同樣將 maskMap.vue import 到 App.vue,
並將模板裡的 <div class="mask-map" id="mask-map"></div> 替換掉:
<!-- App.vue -->
<template>
  <div id="app">
    <aside-menu />
    <maskMap />
    <light-box />
  </div>
</template>

<script>
import { mapActions } from 'vuex';
import asideMenu from './components/asideMenu.vue';
import lightBox from './components/lightbox.vue';
import maskMap from './components/maskMap.vue';

export default {
  name: 'App',
  components: {
    asideMenu,
    lightBox,
    maskMap
  },
  // 以下略..
}
</script>
2
3
4
5
6
7
8
9
10
11
12
13
14
15
16
17
18
19
20
21
22
23
24
25
接著回到 maskMap.vue , 修改 <script> 將 leaflet import 進來,並在 mounted 階段啟動地圖:
import L from 'leaflet';

export default {
  name: 'maskMap',
  data() {
    return {
      // 因為別的地方用不到 map ,所以不需要丟到 vuex
      map: {},
    };
  },
  mounted() {

    // 以下動作將地圖初始化
    this.map = L.map('mask-map', {
      center: [25.03, 121.55],
      zoom: 14,
    });

    L.tileLayer('https://{s}.tile.openstreetmap.org/{z}/{x}/{y}.png', {
      attribution: '<a target="_blank" href="https://www.openstreetmap.org/">© OpenStreetMap 貢獻者</a>',
      maxZoom: 18,
    }).addTo(this.map);

  },
};
2
3
4
5
6
7
8
9
10
11
12
13
14
15
16
17
18
19
20
21
22
23
24
25
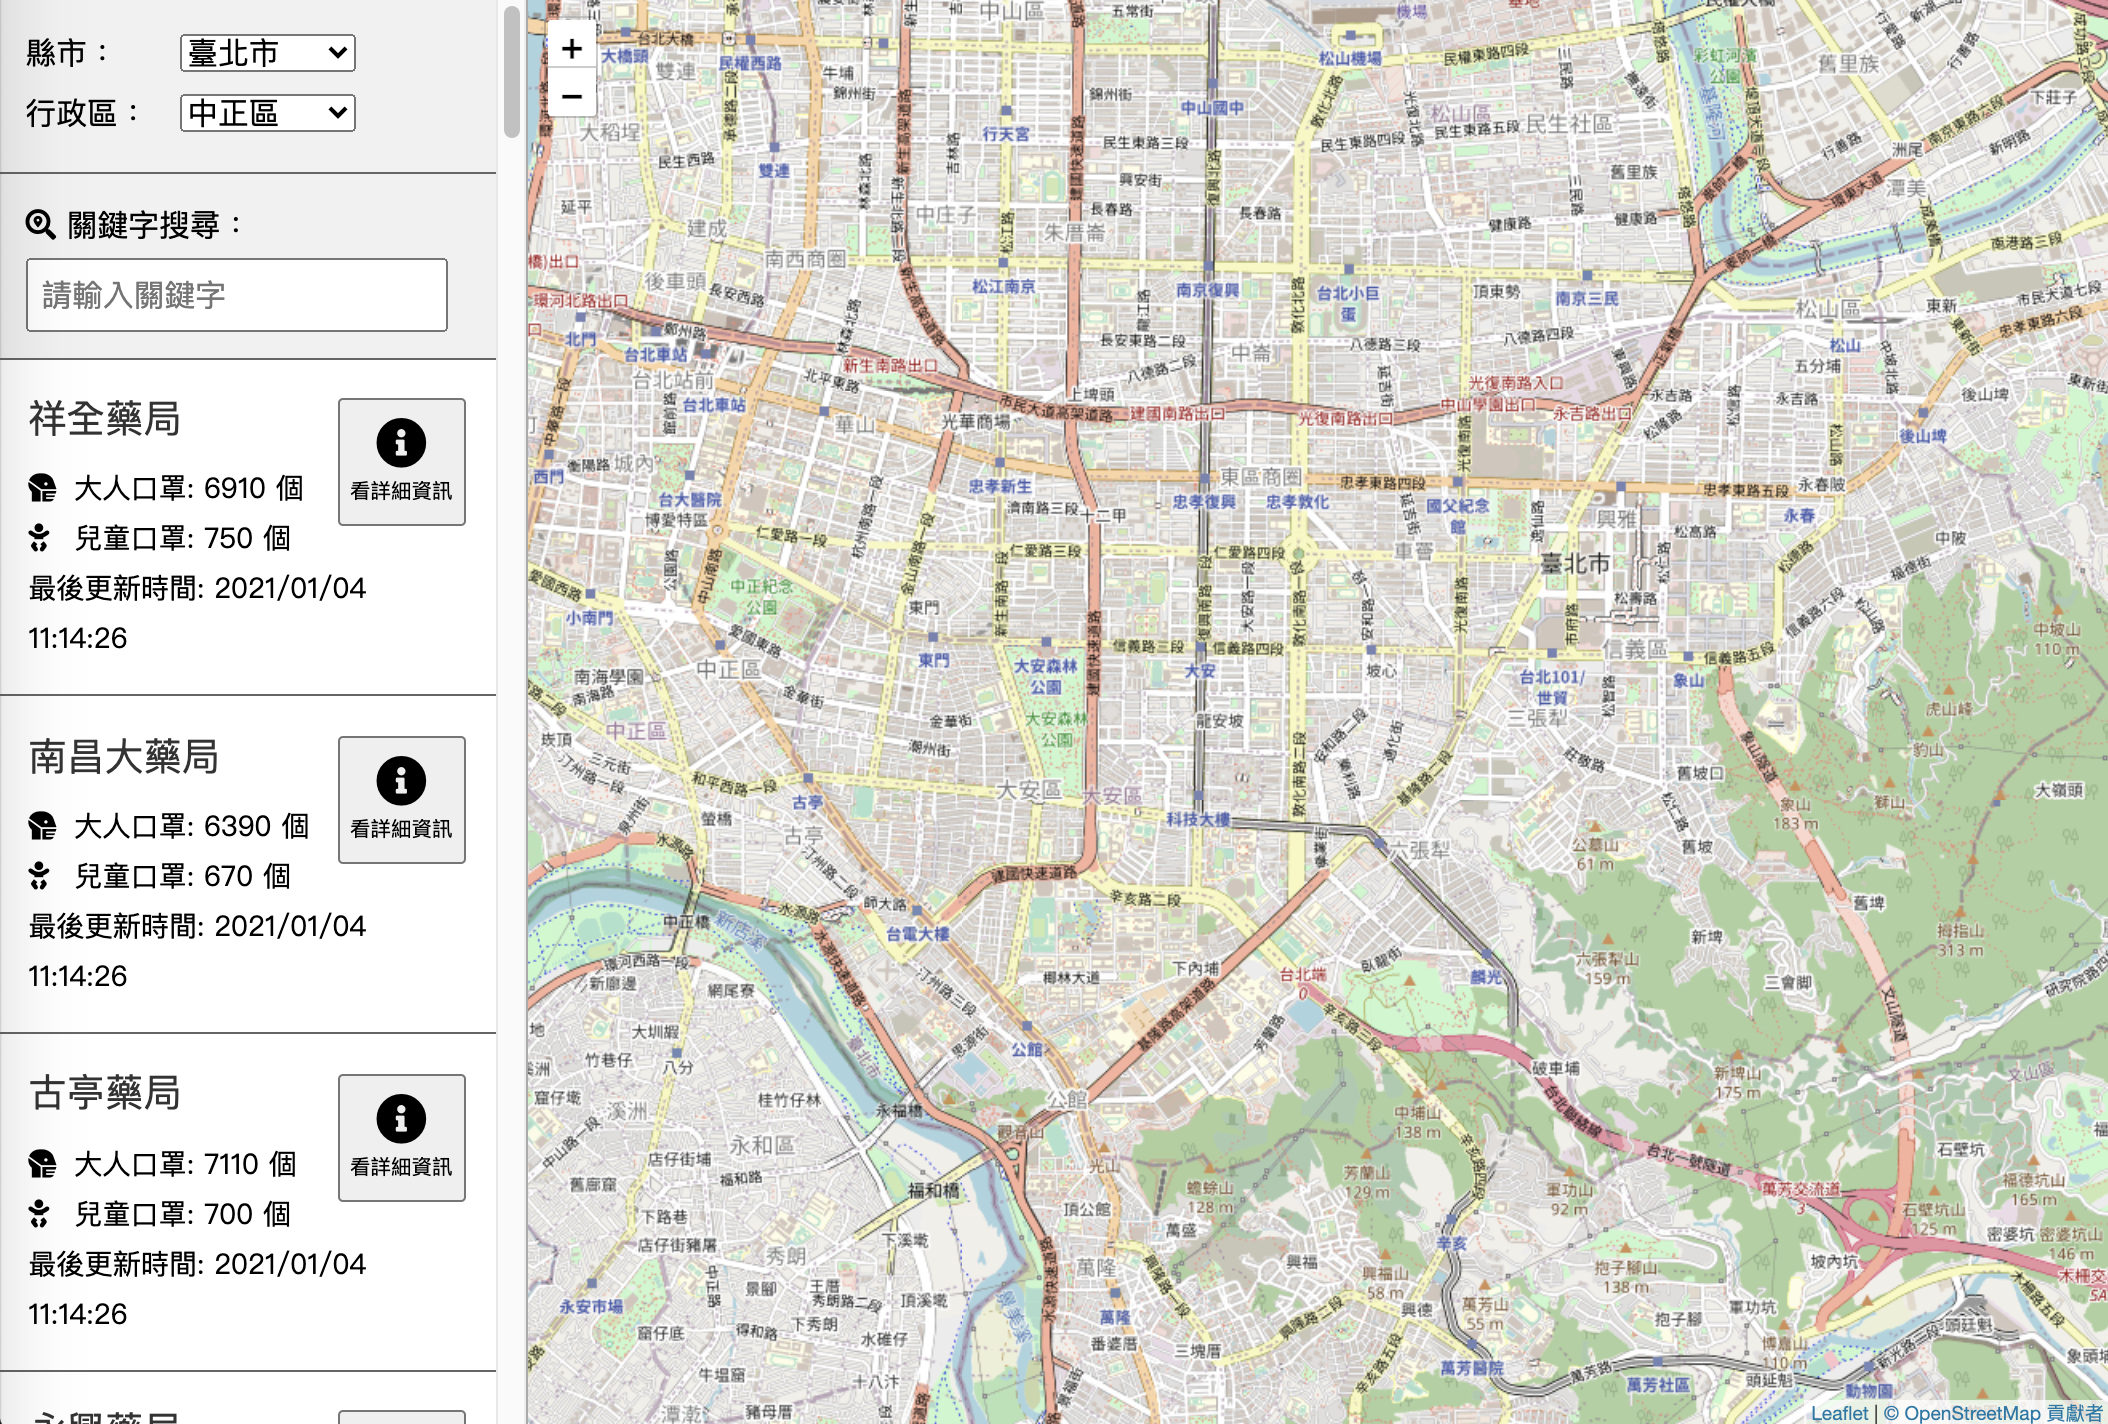
這個時候應該會看到一張地圖出現在右側了。
地圖出現之後,再來我們要完成地圖與左側選單的連動。
也就是當使用者在下拉選單改變了行政區,我們希望讓地圖自動切換到指定的位置。 要達成這個目標,首先我們要先知道目前所選行政區的經緯度資訊。
我們只要在 vuex 透過 state.currDistrict 與 getters.districtList 來比對就可以得到了,
此時在 getters 加上:
currDistrictInfo(state, getters) {
  // 目前所選行政區資訊
  return getters.districtList.find((d) => d.name === state.currDistrict) || {};
},
2
3
4
同樣地在 maskMap.vue 加上 computed 來把 getters 拿回來:
computed: {
  currDistrictInfo() {
    return this.$store.getters.currDistrictInfo;
  },
},
2
3
4
5
就可以取得對應的資訊。
這時候,當使用者切換行政區時,我們可以加個 watch 來進行監測:
watch: {
  // 切換行政區
  currDistrictInfo(dist) {
    // this.map.panTo() 可以指定地圖中心點
    this.map.panTo(new L.LatLng(dist.latitude, dist.longitude));
  },
},
2
3
4
5
6
7
並在此時透過 Leaflet 所提供的 this.map.panTo 來指定地圖中心點。
完成了地點連動的功能,再來就是插入藥局的 marker 標記。
同樣也要取得藥局的列表資訊,還好我們之前在 vuex 已經做過了,所以這裡只需要在 maskMap.vue 加入 computed:
// 也可以使用 mapGetters
computed: {
  currDistrictInfo() {
    return this.$store.getters.currDistrictInfo;
  },
  filteredStores() {
    return this.$store.getters.filteredStores;
  },
},
2
3
4
5
6
7
8
9
然後在 watch 新增 filteredStores,當列表變動時透過 addMarker 來增加標記到地圖上。
watch: {
  currDistrictInfo(dist) {
    // 切換行政區指定地圖中心點
    this.map.panTo(new L.LatLng(dist.latitude, dist.longitude));
  },
  filteredStores(stores) {
    // 根據藥局資訊加上對應 marker
    stores.forEach((element) => this.addMarker(element));
  },
},
2
3
4
5
6
7
8
9
10
最後是 addMarker 的部分,我們把它放在 methods 裡面:
addMarker(item) {
  // 標記的圖示,可自行替換參數
  const ICON = {
    iconUrl: 'https://raw.githubusercontent.com/pointhi/leaflet-color-markers/master/img/marker-icon-2x-violet.png',
    shadowUrl: 'https://cdnjs.cloudflare.com/ajax/libs/leaflet/0.7.7/images/marker-shadow.png',
    iconSize: [25, 41],
    iconAnchor: [12, 41],
    popupAnchor: [1, -34],
    shadowSize: [41, 41],
  };

  // 將標記放置到地圖上
  const marker = L.marker([item.longitude, item.latitude], ICON)
    .addTo(this.map)
    .bindPopup(`<h2 class="popup-name">${item.name}</h2>`);
},
2
3
4
5
6
7
8
9
10
11
12
13
14
15
16
這個時候標記就會出現在地圖上了。
嘿嘿,別高興太早,當我們不斷切換下拉選單的行政區時,你會發現標記數量不會清掉,而是越來越多。
這時就需要在 methods 加上 clearMarkers 方法來清除地圖上的標記:
clearMarkers() {
  // 清除地圖所有標記
  this.map.eachLayer((layer) => {
    if (layer instanceof L.Marker) {
      this.map.removeLayer(layer);
    }
  });
},
2
3
4
5
6
7
8
並且改寫 watch filteredStores 內的任務:
filteredStores(stores) {
  // 先清除原有 marker
  this.clearMarkers();

  // 根據藥局資訊加上對應 marker
  stores.forEach((element) => this.addMarker(element));
},
2
3
4
5
6
7
直到目前為止,我們已經完成了大部分的工作了。
最後,假設我想知道列表中的某間藥局位置,可以做到嗎? 可以的!
首先在 data 新增 markers 陣列,用來存放所有標記資訊:
data () {
  return {
    // 因為別的地方用不到 map ,所以不需要丟到 vuex
    map: {},
    markers: [],
  };
},
2
3
4
5
6
7
然後改寫前面的 addMarker:
addMarker(item) {

  // ...原本的內容不動,因篇幅有限省略...

  // 替 marker 加入 id 與經緯度資訊
  marker.markerId = item.id;
  marker.lng = item.longitude;
  marker.lat = item.latitude;

  // 將 marker push 到陣列裡
  this.markers.push(marker);
},
2
3
4
5
6
7
8
9
10
11
12
最後在 clearMarkers 的時候要記得清空陣列:
clearMarkers() {

  // ...原本的內容不動,因篇幅有限省略...

  // 加上清空陣列
  this.markers.length = 0;
},
2
3
4
5
6
7
並且在 maskMap.vue 的 methods 加上 triggerPopup 這個方法:
triggerPopup(markerId) {
  // 找出目標標記
  const marker = this.markers.find((d) => d.markerId === markerId);

  // 將地圖中心指向目標標記,並開啟 Popup
  this.map.flyTo(new L.LatLng(marker.lng, marker.lat), 15);
  marker.openPopup();
},
2
3
4
5
6
7
8
接著回到 asideMenu.vue 的 <li class="store-info wraps"> 加上 click 事件。
這時問題來了,triggerPopup 寫在 maskMap.vue 身上,要如何從 asideMenu.vue 跨元件觸發 triggerPopup 呢 ?
Vuex 雖然可以幫助我們管理共同資料,但是卻沒有統一的事件控管。
此時,我們可以利用事件傳遞的方式,來觸發跨元件的 method。
首先打開 App.vue,並在 aside-menu 與 mask-map 分別加上 ref 別名:
<template>
  <div id="app">
    <aside-menu @triggerMarkerPopup="openPopup" ref="menu" />
    <mask-map ref="map" />
    <light-box />
  </div>
</template>
2
3
4
5
6
7
並在 aside-menu 加上自訂的事件 triggerMarkerPopup。
同時 App.vue 也新增 openPopup method。
此時唯一要做的就是透過 this.$refs.map 去執行對應 map 的 triggerPopup
methods: {
  ...mapActions(['fetchLocations', 'fetchPharmacies']),
  openPopup(id) {
    this.$refs.map.triggerPopup(id);
  },
},
2
3
4
5
6
再回到 asideMenu.vue,將原本的
<li class="store-info wraps" v-for="s in filteredStores" :key="s.id">
改寫成
<li class="store-info wraps"
    v-for="s in filteredStores" :key="s.id" @click="$emit('triggerMarkerPopup', s.id)">
2
透過 $emit 的方式觸發事件,來達到跨元件 method 的呼叫。 這樣,我們的口罩地圖就完成了!
小提醒
若讀者在開發過程中有任何問題,完整的範例原始碼可參考這個 repo: https://github.com/kurotanshi/mask-map-demo (opens new window)